

How to Make a Rail in Minecraft: A Step-by-Step Guide
How to Make a Rail in Minecraft In Minecraft, rails are essential for creating efficient transportation systems. Whether you want to build a minecart …
Read Article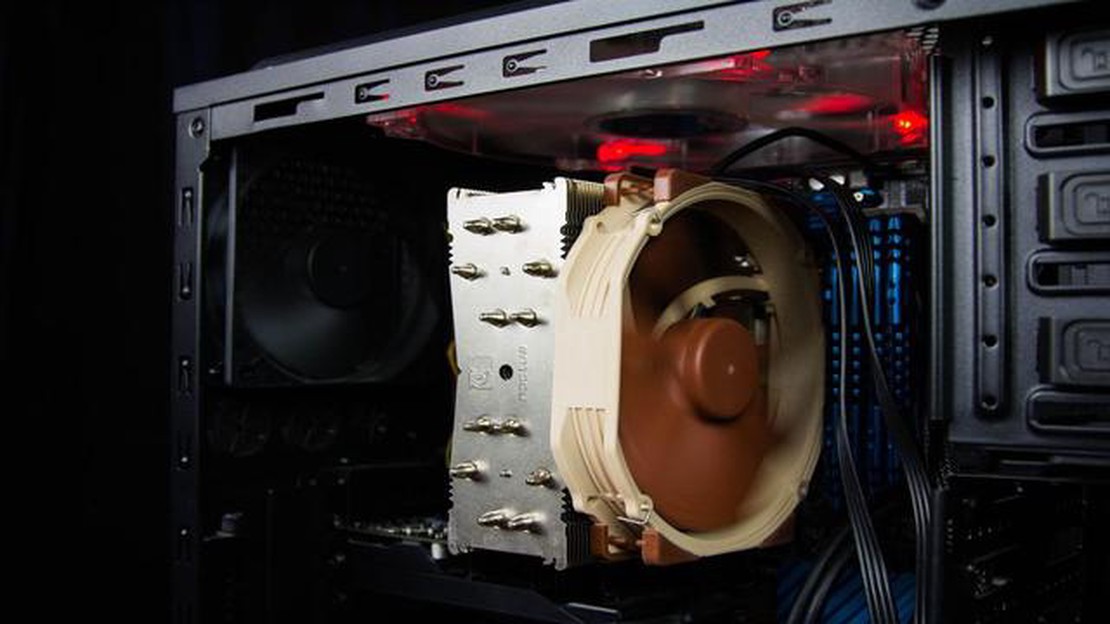
Having a computer that refuses to turn on can be frustrating and worrisome, especially if you rely on it for work or entertainment. However, there are several common issues that could be causing this problem, and luckily, many of them can be easily fixed. In this troubleshooting guide, we will explore five potential fixes to try when your PC randomly won’t turn on.
1. Check the power supply
Before jumping to more complex solutions, it’s essential to start with the basics. Make sure that your computer is properly connected to a power source and that the power supply is functioning correctly. Check if the power cable is securely plugged in and try a different outlet to rule out any issues with the socket.
2. Test the power button
If the power supply seems to be working fine, the next step is to check the power button itself. Sometimes, the button may become stuck or unresponsive, preventing the PC from turning on. Carefully press and release the power button a few times to see if it resolves the issue. If not, consider replacing the power button or contacting a professional for assistance.
3. Remove external devices
In some cases, external devices connected to your computer can interfere with the startup process and prevent it from turning on. Disconnect all peripherals, such as printers, scanners, and USB drives, and then try turning on your PC again. If it powers up, you can reconnect the devices one by one to identify the culprit.
4. Reset the BIOS
If your computer’s BIOS settings have become corrupted or misconfigured, it could lead to startup problems. To fix this, you can try resetting the BIOS to its default settings. Consult your computer’s manual or the manufacturer’s website for instructions on how to access the BIOS and perform a reset.
5. Check for hardware issues
If none of the previous fixes solve the problem, it’s possible that there is a hardware issue causing your PC to not turn on. This could include faulty components such as the motherboard, RAM, or graphics card. In this case, it may be necessary to seek professional help to diagnose and repair the specific hardware problem.
Remember to exercise caution when working with hardware components, especially if you are not experienced. If in doubt, it’s always best to consult a professional to avoid causing further damage to your computer.
By following these five fixes, you can troubleshoot and potentially resolve the issue of your PC not turning on randomly. However, if the problem persists, it’s advisable to seek help from a qualified technician who can diagnose and fix the problem more accurately.
Having your PC refuse to turn on can be incredibly frustrating, especially when you have important work to do or just want to relax with a game. But don’t worry, there are several fixes you can try to get your PC back on track.
Remember, if you’re not comfortable performing these fixes yourself, it’s always best to seek assistance from a professional technician. They can diagnose and resolve any underlying hardware issues that may be preventing your PC from turning on.
One common reason why a PC may not turn on is due to a dead power supply. The power supply is responsible for providing the necessary power to all the components of the computer. If it fails, the PC will not be able to turn on.
To check if the power supply is dead, follow these steps:
Remember to turn off the power and unplug the power cord before working on the PC’s internal components. If you’re not comfortable or confident in replacing the power supply yourself, it’s best to seek professional assistance to avoid any further damage or injury.
Read Also: How to Access and Watch Your Saved Mobile Legends Videos
In some cases, your PC may not turn on due to connection issues with its cables. It’s essential to ensure that all the necessary cables are securely plugged in to eliminate this possibility.
Follow these steps to ensure all cables are properly connected:
If you suspect a cable might be faulty, try using a different cable to see if the issue is resolved. Sometimes, cables can become loose or damaged, causing connectivity problems.
It’s also worth checking for any loose connections inside your PC. Open the computer case and ensure that all internal cables, such as the power supply cables or data cables, are securely connected to their respective components.
By ensuring all cables are securely plugged in, you can eliminate connection issues as a possible cause for your PC not turning on.
If your PC won’t turn on randomly, one possible cause is faulty RAM (Random Access Memory) modules. RAM is responsible for temporarily storing data that your computer needs to access quickly. If the RAM is not functioning properly, it can prevent your PC from turning on.
Read Also: 5 Effective Methods to Get Shiny Pokemon and Boost Your Collection
To troubleshoot this issue, you can follow these steps:
If you have replaced the RAM modules and your PC still won’t turn on, it’s recommended to seek professional assistance or contact the manufacturer for further troubleshooting or repair options.
One of the common reasons why a PC may randomly not turn on is overheating. Over time, dust and debris can accumulate inside the computer, clogging the ventilation system and restricting airflow. This can cause the internal components to overheat, leading to system failures or shutdowns.
To fix this issue, it is important to regularly clean the dust and ensure proper ventilation for your PC. Here are a few steps to follow:
It is recommended to clean the dust from your PC at least every few months, depending on the environment and usage. This will help prevent overheating issues and ensure the longevity of your computer.
In addition to cleaning the dust, you can also consider using cooling pads or additional fans to improve the airflow and keep your PC running at optimal temperatures.
If your PC won’t turn on, there are several troubleshooting steps you can try. First, make sure the power cable is securely plugged into both the wall outlet and the back of the computer. Then, check if the power supply switch is turned on. If the issue persists, try a different power outlet or power cable. If none of these steps work, there may be a hardware issue that requires professional assistance.
If your PC is not turning on after a power outage, there are a few possible reasons. First, check if the circuit breaker for the outlet that your computer is plugged into has been tripped. If it has, reset the breaker and try turning on your PC again. If that doesn’t work, the power outage may have damaged your power supply. In this case, you may need to replace the power supply to get your PC to turn on again.
If your PC turns on but nothing appears on the screen, the issue could be with your monitor. First, check if the monitor is properly connected to your computer. If it is, try turning off the monitor and then turning it back on. If that doesn’t work, there may be an issue with your graphics card or the connection between your computer and the monitor. You can try reseating the graphics card or using a different cable to connect the monitor.
If your PC is randomly shutting down and then refusing to turn back on, there may be an issue with your power supply. The power supply may be overheating and shutting down to protect itself. Check if the power supply fan is spinning properly and if there is any dust or debris blocking the airflow. If the fan is not spinning or the power supply is too hot to touch, you may need to replace the power supply to fix the issue.
If your PC is turning on but not booting into Windows, there may be an issue with your operating system. First, try restarting your computer to see if that resolves the issue. If not, you can try using the Windows Recovery Environment to repair your operating system. To access the recovery environment, restart your computer and repeatedly press the F8 key until the Advanced Boot Options menu appears. From there, you can select “Repair Your Computer” and follow the on-screen instructions to fix any issues with your operating system.
How to Make a Rail in Minecraft In Minecraft, rails are essential for creating efficient transportation systems. Whether you want to build a minecart …
Read Article
How To Draw A Pekka From Clash Royale? Clash Royale is a popular freemium mobile strategy game developed and published by Supercell. In the game, …
Read Article
Mobile Legends Which Hero To Buy? Mobile Legends is a popular mobile game that pits players against each other in intense 5v5 battles. With a wide …
Read Article
How To Make All Potions In Minecraft? Welcome to the ultimate guide on crafting potions in Minecraft! Potions are a powerful tool that can enhance …
Read Article
How To Time Travel On Animal Crossing? Animal Crossing: New Horizons has become a worldwide sensation since its release in March 2020. With its …
Read Article
How To Recover Old Mobile Legends Account? Have you ever lost access to your Mobile Legends account and felt frustrated trying to get it back? Well, …
Read Article


