

The Best USB Wi-Fi Adapter in 2022: Top Picks and Buying Guide
The best USB Wi-Fi adapter in 2022 Are you tired of your slow and unreliable internet connection? Upgrade your Wi-Fi experience with the best USB …
Read Article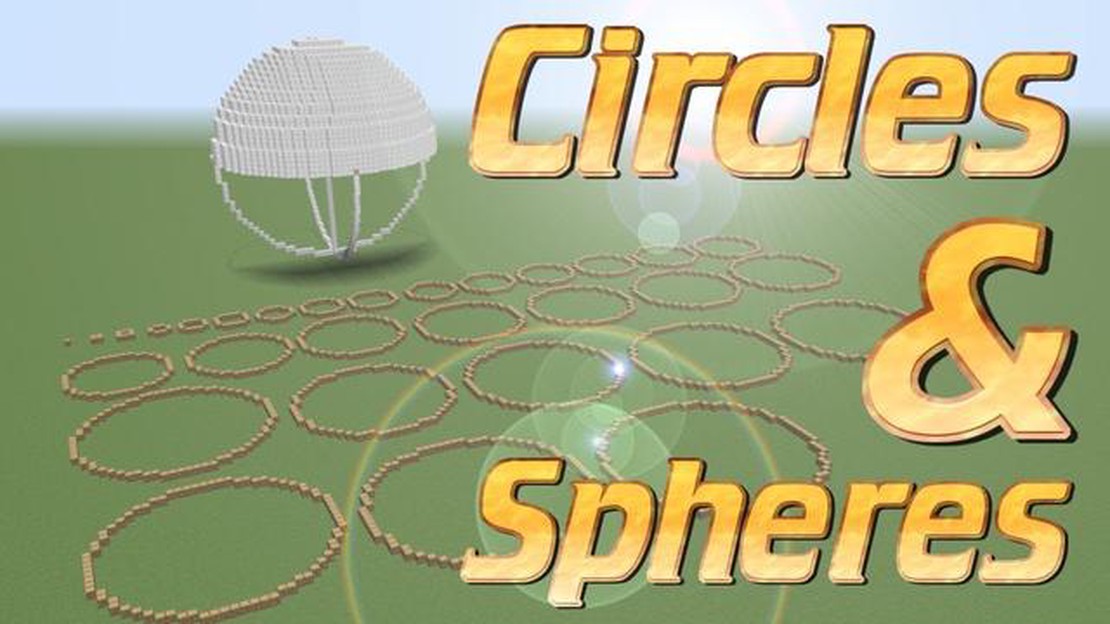
If you’re a Minecraft player looking to add some architectural flair to your world, building a circle can be a great way to achieve a more elegant and rounded aesthetic. While Minecraft primarily uses square blocks, it is still possible to create smooth and symmetrical circles with a little bit of creativity and planning.
In this step-by-step guide, we will walk you through the process of building a circle in Minecraft. We will cover everything from choosing the right location, determining the size and shape of your circle, and placing the blocks to create a perfect circle.
Building a circle in Minecraft can be a fun and rewarding experience for players of all skill levels. So let’s dive in and learn how to bring some curves to your Minecraft world!
Note: This guide assumes that you already have a basic understanding of how to play Minecraft and have access to the necessary building materials in the game.
Building circles in Minecraft can be a bit challenging, especially if you don’t know the right technique. Follow these steps to create a perfect circle in your Minecraft world:
Remember to experiment and adjust the size and shape of your circles to suit your preferences. Building perfect circles may take some practice, but with time, you’ll master the technique and be able to create amazing structures in your Minecraft world!
Before you can start building a circle in Minecraft, you will need to gather a few materials. Here’s what you’ll need:
Read Also: 5 Legit Ways to Get Free Diamonds in Mobile Legends Without Hacking
Once you have gathered all your materials, you will be ready to start building your circle in Minecraft. Make sure you have enough of each item before you begin, as it can be frustrating to run out of supplies in the middle of your build.
When building a circle in Minecraft, it’s important to start with a solid base. This base will serve as the foundation for your circle and provide stability for the rest of the build.
To create a base, follow these steps:
Once you have created your base, you can start building the walls and adding details to your circle. Remember to take your time and be precise, as the base will determine the overall shape and symmetry of your circle.
Read Also: Discover the top Minecraft shaders for version 1.20
To build a circle in Minecraft, you will need to follow these steps:
Building a circle in Minecraft requires patience and precision, but with practice, you can create circles of any size and shape. Experiment with different techniques and materials to achieve the desired look for your circle. Have fun building!
Minecraft is a popular sandbox game where players can build, explore, and survive in a virtual world made of blocks.
Building a circle in Minecraft can add variety and aesthetic appeal to your structures. It can also be a challenge and a way to showcase your creativity.
Yes, you can build a circle in Minecraft without using any external tools by following a step-by-step process outlined in the article. However, using external tools such as Minecraft circle generators can make the process easier and more precise.
Some tips for building a circle in Minecraft include using a compass or circle generator, starting with a small circle and gradually expanding it, using a grid system for accuracy, and experimenting with different block types and patterns to create unique designs.
The best USB Wi-Fi adapter in 2022 Are you tired of your slow and unreliable internet connection? Upgrade your Wi-Fi experience with the best USB …
Read Article
Where To Find Noctilucous Jades In Genshin Impact? Welcome to our ultimate guide on finding Noctilucous Jades in Genshin Impact! Noctilucous Jades are …
Read Article
How To Get More Villagers In Animal Crossing? If you’re a fan of Animal Crossing, you know that one of the most exciting and rewarding aspects of the …
Read Article
Where Are The Io Guards In Fortnite? If you’re looking to complete Fortnite’s challenges or simply want to know more about the game’s lore, you may …
Read Article
Divinity: Original Sin 2 beginner’s guide Welcome to the exciting world of Divinity: Original Sin 2! Whether you’re a seasoned RPG player or new to …
Read Article
How To Get More Pokeballs In Pokemon Go? Pokeballs are essential items in the popular augmented reality game, Pokemon Go. They are used to catch …
Read Article


