


Learn How to Slide in Call of Duty Warzone - Tips and Tricks
How To Slide In Call Of Duty Warzone? If you want to gain a competitive edge in Call of Duty Warzone, mastering the art of sliding can give you a …
Read Article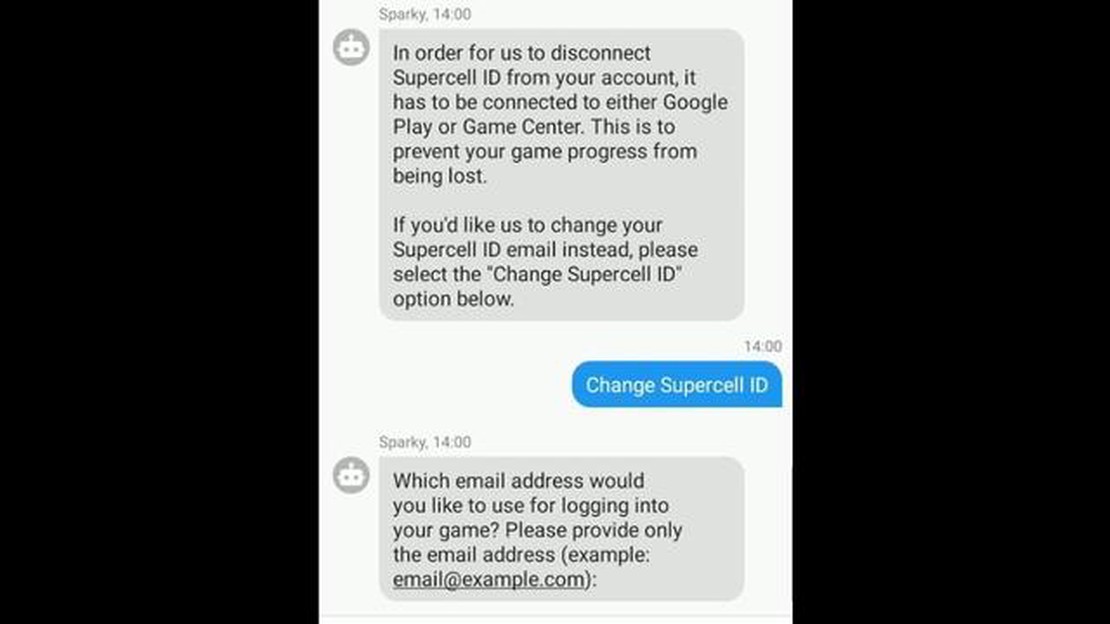
Changing your Supercell ID email in Clash Royale is a simple process that can be done in just a few easy steps. Whether you’ve recently changed your email address or simply want to update your account information, this guide will walk you through the process.
Before you begin, make sure you have access to both the old and new email addresses associated with your Supercell ID. This will be important for verifying your identity and completing the email change process.
To get started, open the Clash Royale app on your device and navigate to the settings menu. Look for the Supercell ID section and select “Manage Account.” This will take you to the Supercell ID settings page, where you can make changes to your account information.
On the Supercell ID settings page, you’ll see a section labeled “Email.” Click on the “Change Email” button to initiate the email change process. You’ll be prompted to enter your current Supercell ID email and password for verification purposes.
Once you’ve entered the required information, you’ll need to enter your new email address twice to confirm it. Take care when entering your new email address to avoid any typos or errors. After verifying your new email address, select “OK” to proceed.
At this point, you’ll receive an email to your old email address containing a verification code. Check your email and retrieve the verification code. Return to the Clash Royale app and enter the code into the designated field. This will verify your identity and complete the email change process.
Congratulations! You’ve successfully changed your Supercell ID email in Clash Royale. Going forward, make sure to use your new email address when logging into your Supercell ID to access your Clash Royale account.
Remember, it’s important to keep your account information up to date to ensure the security and integrity of your Clash Royale account. With just a few simple steps, you can easily change your Supercell ID email and keep your account information current.
If you want to change the email associated with your Supercell ID in Clash Royale, you can follow these easy steps:
It is important to note that changing your Supercell ID email will not affect your in-game progress or purchases. It only changes the email associated with your account.
Read Also: Master Your Skills: Learn How To Become A Star Player In Brawl Stars!
If you encounter any issues or have any further questions, you can contact Supercell support for assistance.
To change your Supercell ID email in Clash Royale, you will need to access the Supercell ID settings. Follow the steps below to do so:
By following these steps, you will be able to change your Supercell ID email in Clash Royale and continue accessing your account with the new email address.
To change your Supercell ID email in Clash Royale, you will need to verify your account. The verification process helps to ensure that the person making the change is the rightful owner of the account.
Here are the steps to verify your account:
After successfully verifying your account, you will be able to proceed with changing your Supercell ID email. It’s important to keep your account secure by choosing a strong and unique email address for your Supercell ID.
Read Also: Animal Crossing New Leaf: How Many Villagers Can You Have?
Note: If you do not receive the verification email, check your spam or junk folder. If you still cannot find the email, you can try resending the verification email through the Supercell ID settings.
If you want to change the email associated with your Supercell ID in Clash Royale, you can follow these easy steps:
It’s important to keep your Supercell ID email up to date as it is used to secure your account and recover it in case of any issues.
Note: Make sure to remember your new email address and keep it secure to avoid any unauthorized access to your Clash Royale account.
Changing your Supercell ID email is a simple process that can be done within the game settings. Follow the steps above to update your email address and ensure the security of your Clash Royale account.
Supercell ID is a service provided by Supercell that allows players to have multiple game accounts under one email address. It also provides backup and recovery options for game progress.
Yes, you can change your Supercell ID email without losing your game progress. The game progress is tied to your Supercell ID, not your email address. Follow the steps mentioned in the article to change your email without any issues.
Yes, you can link multiple Clash Royale accounts to one Supercell ID email. This allows you to switch between different game accounts easily without needing multiple email addresses.
If you forgot your Supercell ID password, you will need to reset it before you can change your email. Follow the ‘Forgot Password’ option in the Supercell ID login screen to reset your password. Once you regain access to your account, you can proceed with changing your email as mentioned in the article.
How To Slide In Call Of Duty Warzone? If you want to gain a competitive edge in Call of Duty Warzone, mastering the art of sliding can give you a …
Read Article
Homa Staff Genshin Impact Genshin Impact is a popular action role-playing game that offers players a vast open world to explore. One of the many …
Read Article
A guide to solving the Headlong puzzle in Destiny 2: Lightfall In Destiny 2: Lightfall, the Headlong puzzle is one of the most challenging puzzles …
Read Article
How Much Storage Does Fortnite Take Up? If you are an avid Fortnite player, you may have wondered how much storage space the game takes up on your …
Read Article
How To Change Name In Coin Master? Do you want to change your name in the popular mobile game Coin Master? Maybe you have grown tired of your current …
Read Article
Which Pokemon Packs To Buy? Are you having trouble deciding which Pokemon packs to buy? With so many options available, it can be overwhelming to …
Read Article


