

3 Easy Methods to Get Free Gems in Brawl Stars 2022 with No Human Verification
How To Get Free Gems In Brawl Stars 2022 Without Human Verification? Are you in search of free gems in Brawl Stars but tired of those time-consuming …
Read Article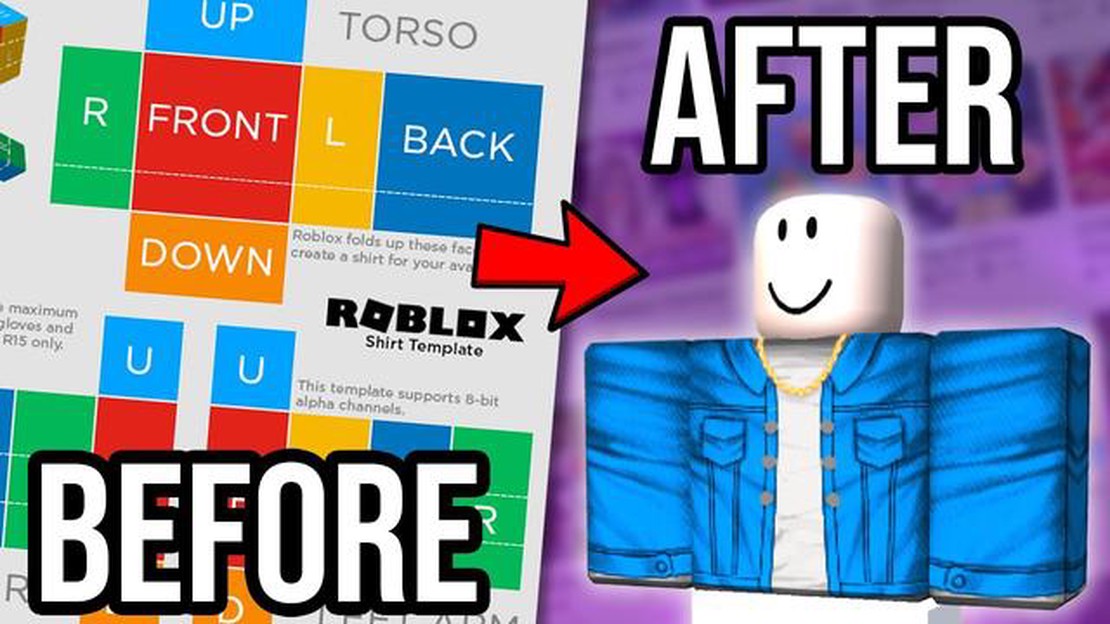
Roblox is a popular online platform that allows users to create and play games. One of the most exciting features of Roblox is the ability to create your own clothing and accessories for your avatar. This step-by-step guide will walk you through the process of creating your own Roblox clothing, so you can stand out among the millions of players.
First, you’ll need to have a basic understanding of Roblox Studio, the platform’s development tool. If you’re new to Roblox Studio, don’t worry – it’s designed to be user-friendly and there are plenty of tutorials and resources available to help you get started. Once you’ve familiarized yourself with Roblox Studio, you can begin the process of creating your own clothing.
Start by opening Roblox Studio and creating a new project. Choose the “Baseplate” template, which will provide you with a blank canvas to work with. Next, click on the “View” tab at the top of the screen and select “Explorer” to bring up the explorer window. In the explorer window, right-click on “Workspace” and select “Insert Object.” Choose the “Shirt” option from the list of objects, which will create a new shirt template for you to work with.
Once you have your shirt template, you can begin customizing it. To do this, click on the template in the explorer window to open the properties window. Here, you can change the color of the shirt, add patterns or designs, and adjust the size and position of different elements. You can also add additional parts to the shirt, such as sleeves or collars, by right-clicking on the template and selecting “Insert Object.”
Once you’re satisfied with your design, you can save it by clicking on the “File” tab at the top of the screen and selecting “Publish to Roblox.” This will make your clothing available for purchase or use by other players. You can also upload your design to the Roblox catalog, where other players can browse and purchase it. Congratulations – you’ve now created your own Roblox clothing!
If you want to create your own clothing items in Roblox, follow these easy steps:
You can use any design software that allows you to create images with transparent backgrounds. Some popular options include Adobe Photoshop, GIMP, and Paint.net. 2. Create your clothing design:
Open your chosen design software and create a new image with the dimensions specified by Roblox. The dimensions vary depending on the type of clothing item you want to create. Refer to Roblox’s guidelines for the specific dimensions. 3. Design your clothing:
Use the tools available in your design software to create your desired clothing design. You can add colors, patterns, logos, or any other elements you like. Remember to keep the design within the specified dimensions and consider how it will look when worn by a Roblox character. 4. Save your design:
Once you are satisfied with your clothing design, save it as a PNG file. Make sure the background is transparent and the image quality is high. 5. Upload your design to Roblox:
Log in to your Roblox account and go to the “Create” section. Click on “My Creations” and then “Shirts” or “Pants” depending on the type of clothing item you created. Click on “Choose File” and select the PNG file of your design. Give your clothing item a name and click on “Upload” to upload your design to Roblox. 6. Configure your clothing item:
After uploading your design, you will be taken to a configuration page. Here, you can set the price, description, and other details for your clothing item. Make sure to provide accurate information and choose an appropriate price for your creation. 7. Publish your clothing item:
Once you have configured all the necessary details, click on “Save” or “Publish” to make your clothing item available for others to purchase and wear in Roblox.
Congratulations! You have successfully created your own clothing item in Roblox. Now, other players can buy and wear your design in their virtual adventures.
Roblox Studio is the primary tool used for creating clothing and other content within the Roblox platform. It is a powerful and versatile editor that allows users to design, build, and script their own games and experiences.
To get started with Roblox Studio, you will first need to download and install it on your computer. Roblox Studio is available for Windows and Mac. Once installed, launch the program and create a new game or open an existing one.
Roblox Studio provides a wide range of creation tools that you can use to design and customize your clothing items. Here are some of the main tools you will be working with:
As you become more comfortable with Roblox Studio and its creation tools, you will be able to experiment with different techniques and styles to create unique clothing designs. Remember to save your progress regularly and test your creations in-game to ensure they look and function as intended.
| Tool | Description |
|---|---|
| Parts | Basic building blocks used to create clothing designs |
| Meshes | Imported 3D objects that can enhance clothing items |
| Paint | Applies colors, textures, and patterns to clothing items |
| Plugins | Third-party tools that enhance the functionality of Roblox Studio |
| Scripts | Code snippets that add interactivity to clothing items |
Read Also: Learn how to get the Viking Heart Card in Coin Master
When creating your own clothing in Roblox, you’ll need to design the textures and templates for your clothing items. These textures and templates will be used to create the visual appearance of your clothing items.
Textures:
Textures are the images or patterns that are applied to the clothing items. They can be created in graphic design software like Photoshop or GIMP, or you can use pre-made textures available online. When designing your textures, keep in mind the size and orientation of the clothing item. You’ll need to create different textures for different parts of the clothing, such as front, back, sleeves, etc.
Tip: Experiment with different patterns, colors, and designs to create unique and eye-catching textures for your clothing items.
Templates:
Templates are like blueprints that define the shape and structure of your clothing items. They act as guides for applying the textures to the 3D model of the clothing item. You can find pre-made templates for different clothing items on the Roblox website or create your own using 3D modeling software like Blender or Autodesk Maya.
Read Also: What Is The Best Duo In Brawl Stars? Find Out The Ultimate Winning Combination!
Tip: Make sure your templates are accurate and aligned properly with the 3D model of the clothing item to ensure a good fit and appearance when worn in Roblox.
Once you have your textures and templates ready, you can upload them to Roblox and apply them to your clothing items using the Roblox Studio. This will allow you to see how the clothing items will look in the Roblox game environment and make any necessary adjustments to the design.
Tip: Don’t forget to test your clothing items in different lighting conditions and on different avatars to ensure they look good in various scenarios.
Designing your clothing items’ textures and templates is an important step in creating unique and appealing clothing items in Roblox. Take your time to experiment, be creative, and pay attention to detail to make your clothing stand out in the Roblox community.
Creating custom clothing for your Roblox avatar allows you to express your unique style and stand out in the virtual world. To get started, you’ll need an image editing software that supports transparency, such as Adobe Photoshop or GIMP.
Follow these step-by-step instructions to create your own custom clothing:
Remember, creating custom clothing takes practice and experimentation. Don’t be afraid to try different techniques and designs to find what works best for you. With time and effort, you’ll become a master at creating unique clothing for your Roblox avatar.
After creating your clothing design, you can now proceed to upload and test it on Roblox. Below are the steps on how to publish your clothing:
Note that there may be additional steps or requirements depending on your account’s settings or if you intend to upload the clothing as a group or game asset.
Once published, your clothing design will be available for other players to purchase, trade, or wear on their Roblox avatars. Congratulations on completing the process of creating and publishing your clothing on Roblox!
Roblox clothing refers to the virtual outfits or items that players can create, customize, and wear in the Roblox game.
To create your own Roblox clothing, you need to have a premium Roblox membership. Once you have that, you can use the Roblox Studio to design and create clothing items using templates and the various design tools available.
Roblox Studio is a powerful, free software that allows users to create games and virtual worlds on the Roblox platform. It provides a range of tools and features to design and build various elements, including clothing items.
You can find clothing templates for Roblox on the Roblox website. They provide a wide range of templates for different clothing items and accessories that you can download and customize.
Roblox Studio provides various design tools, including painting and texturing tools, 3D modeling tools, and more. These tools allow you to visually create and customize the appearance of your clothing items.
Yes, you can sell the clothing items you create in Roblox. Once you have created a clothing item, you can upload it to the Roblox catalog and set a price for it. Other players can then purchase your item using the in-game currency (Robux).
Yes, there are certain restrictions and guidelines that you need to follow when creating Roblox clothing. For example, you need to ensure that your clothing items do not violate the Roblox content policy, which includes rules against explicit or inappropriate content.
How To Get Free Gems In Brawl Stars 2022 Without Human Verification? Are you in search of free gems in Brawl Stars but tired of those time-consuming …
Read Article
Among Us How To Get Kill Animations? Among Us has taken the gaming world by storm with its exciting and mysterious gameplay. One of the most enjoyable …
Read Article
Where To Find Ruckus In Fortnite? If you’re on the hunt for Ruckus in Fortnite, you’ve come to the right place. Ruckus is a rare and sought-after …
Read Article
How To Earn Magic Dust In Mobile Legends? Mobile Legends: Bang Bang is one of the most popular mobile games in the world, and Magic Dust is an …
Read Article
Lego Builder’s Journey review Lego Builder’s Journey is a captivating puzzle game that takes players on a magical journey through a world made …
Read Article
Kenshi review Kenshi is a sandbox RPG developed and published by Lo-fi Games. This game stands out from the crowd due to its unique features and …
Read Article


