


How to Enter the Playground Fortnite: A Step-by-Step Guide
How to Enter the Playground Fortnite Fortnite has become one of the most popular online games, with millions of players around the world. One of the …
Read Article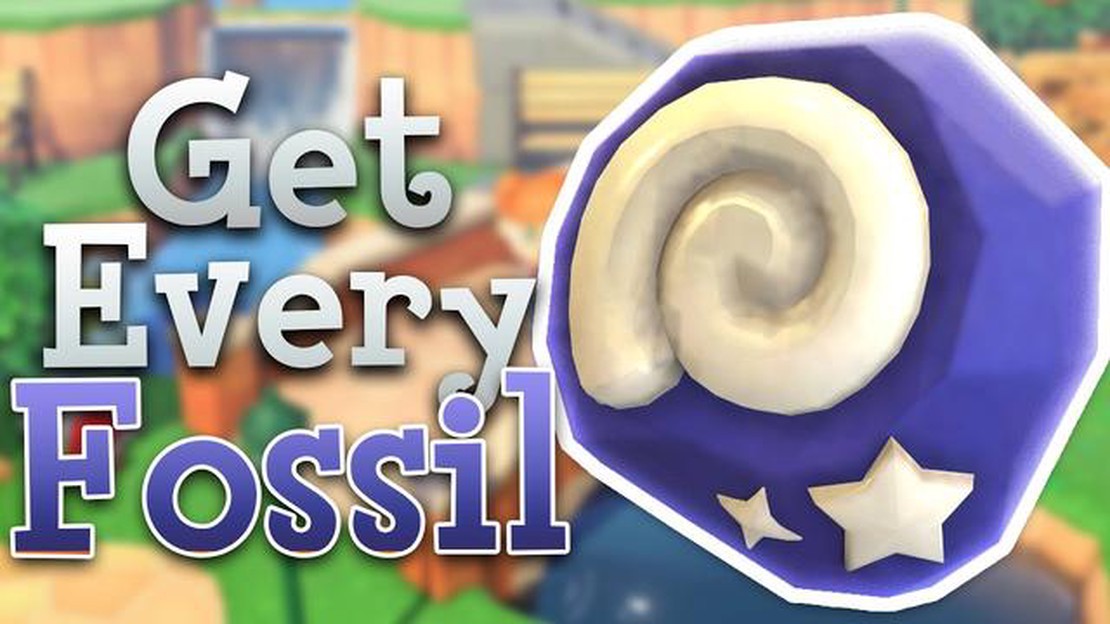
Animal Crossing: New Horizons is a beloved video game that allows players to create their own virtual island paradise. One of the many exciting activities in the game is finding fossils, which can then be donated to the island’s museum for display. But how do you go about finding fossils in Animal Crossing? In this article, we will explore the best techniques for finding these hidden treasures.
First and foremost, it’s important to know where to look for fossils. Fossils can be found buried underground, and the best way to locate them is by looking for cracks in the ground. These cracks are an indication that there is a fossil buried beneath the surface. To find a fossil, simply equip your shovel and start digging in the area with the crack. With a bit of luck, you will uncover the fossil and be one step closer to completing your museum collection.
Once you have found a fossil, it’s important to handle it with care. Fossils are delicate pieces of history, and they can easily break if mishandled. To prevent this from happening, make sure to dig around the fossil first before attempting to remove it. Slow and gentle movements are key. If you’re having trouble removing the fossil without breaking it, you can always try again the next day. Remember, patience is a virtue!
When you have successfully excavated a fossil, you have the option to either donate it to the museum or sell it for some extra bells. Donating fossils to the museum is a great way to contribute to your island’s cultural significance and unlock interesting facts about the creatures that once roamed the earth. Selling fossils, on the other hand, can be a lucrative way to make money in the game. It’s entirely up to you how you want to proceed with your newfound fossil.
By following these techniques, you will be well on your way to becoming a master fossil hunter in Animal Crossing. Happy digging!
Animal Crossing is a relaxing and enjoyable game that allows players to create and customize their own virtual island. One of the many activities you can partake in is fossil hunting. Fossils are ancient remains of prehistoric creatures that can be found buried in the ground on your island. Here are some techniques to help you find fossils in Animal Crossing.
The most basic technique for finding fossils is to use a shovel. Walk around your island and look for small, X-shaped cracks in the ground. These cracks indicate that there is a fossil buried below. Equip your shovel and dig in that spot to unearth the fossil. Once you have found a fossil, it will automatically be placed in your inventory.
Another technique to find fossils is to follow your ears. Occasionally, while walking around your island, you may hear a soft “thud” sound. This sound indicates that there is a fossil buried nearby. Stop and investigate the area where you heard the sound, and you are likely to find a fossil.
Rock clusters are formations of several rocks grouped closely together. These clusters are prime spots for finding fossils. Use your shovel to dig in the empty spaces between the rocks, as fossils often hide there. Be sure to dig carefully to avoid accidentally breaking any rocks.
If you are having trouble finding fossils or want to make sure you have found all the fossils on your island, pay a visit to Blathers. Blathers is the knowledgeable owl who runs the island’s museum. He can assess your fossils and let you know if you have found any new ones. Simply bring your fossils to him, and he will provide you with information about them.
In addition to being buried in the ground, fossils can also wash up on the beach. Take a stroll along the coastline of your island and keep an eye out for any shadowy shapes. These shadows indicate that a fossil has washed ashore. Go up to the shadow and press the A button to pick up the fossil.
By using these techniques, you will be well on your way to building a remarkable fossil collection in Animal Crossing. Happy hunting!
Identifying fossil spots in Animal Crossing can be a rewarding and exciting experience. By following these techniques and tips, you can improve your chances of finding fossils in the game:
By following these techniques and exploring different areas in the game, you’ll increase your chances of finding fossils in Animal Crossing. Happy hunting!
When it comes to finding fossils in Animal Crossing, having the right tools can make all the difference. Here are some of the essential tools that will help you maximize your chances of finding fossils:
While these are the most important tools for fossil hunting, there are a few other items that can come in handy:
Read Also: When Does Call Of Duty: Black Ops 4 Take Place? | Game's Timeline Revealed
Remember, fossil hunting in Animal Crossing takes time and patience. Keep exploring your island every day and make sure to dig up all the digging spots to increase your chances of finding rare fossils.
When you’re digging up fossils in Animal Crossing, there’s a chance that you may encounter duplicates. It can be frustrating to find the same fossil multiple times, especially when you’re hoping to complete your museum collection. However, there are a few ways to deal with fossil duplicates in the game.
Read Also: Ultimate Guide: How To Play Save The World In Fortnite!
1. Donate the duplicates to the museum.
If you’ve already donated a particular fossil to the museum, you can still find duplicates of it. Rather than selling or discarding these duplicates, consider donating them to the museum. Blathers, the owl who runs the museum, will happily accept any fossils you bring him. This way, you can help complete the museum’s collection and earn some additional rewards.
2. Trade the duplicates with friends or other players.
If you have friends or other players who also play Animal Crossing, you can try trading your duplicate fossils with them. This way, you can both complete your museum collections faster by exchanging fossils that you need. Utilize online forums, social media groups, or even visit other players’ islands to find potential trading partners.
3. Sell the duplicates for Bells.
If you’ve already completed the fossil section of the museum or don’t want to trade the duplicates, you can sell them for Bells at Nook’s Cranny or through the drop-off box. While you won’t earn as many Bells as you would from selling other items, it’s still a way to make some extra money in the game.
4. Decorate your island with the duplicates.
If you don’t want to sell or trade the duplicates and have already donated them to the museum, you can use them to decorate your island. Fossils can be placed as furniture items and can add a unique touch to your outdoor areas. Get creative and arrange them in inventive ways to create a fossil-themed garden or display.
5. Save them for when Redd visits.
Redd, the shady art dealer, occasionally visits your island to sell fake and genuine artwork. He may also bring along other items, including fossils. If you save your duplicate fossils, you can try selling them to Redd for a higher price when he visits. While this won’t happen as frequently as the other options, it can be a way to earn more Bells for your duplicates.
Remember, dealing with fossil duplicates is just part of the game. Don’t get too discouraged if you keep finding the same fossils - keep digging and exploring, and you’ll eventually complete your fossil collection in Animal Crossing!
There are a few tips for finding fossils in Animal Crossing. First, make sure to walk around your island every day and dig up any suspicious-looking cracks in the ground. These cracks indicate the presence of a fossil buried underground. Additionally, if you see a fossil shadow while fishing, be sure to cast your line near it to catch the fossil. Finally, don’t forget to check the beaches as well, as fossils can sometimes wash up on shore.
In Animal Crossing, you have the opportunity to find up to four fossils each day. These fossils can be found by walking around your island and digging up the cracks in the ground. It’s important to check every day, as the locations of the fossils will change and new fossils will spawn.
Yes, it is possible to find rare fossils in Animal Crossing. There are several rare and valuable fossils that can be found in the game, such as the T. rex skull or the Triceratops tail. These rare fossils can be sold for a high price or donated to the museum to complete the fossil collection.
If you find duplicate fossils in Animal Crossing, you have a few options. First, you can sell them to the Nook’s Cranny shop for some extra bells. Alternatively, you can give them to your friends or other players who may need them to complete their own fossil collections. Finally, you can also display duplicate fossils in your house or island to add some decoration.
How to Enter the Playground Fortnite Fortnite has become one of the most popular online games, with millions of players around the world. One of the …
Read Article
A new South Park game is coming in 2024 and this time it’s not an RPG South Park fans rejoice! A new South Park game is set to be released in 2024, …
Read Article
When Was The First Call Of Duty Game Made? Call of Duty is a popular franchise known for its intense first-person shooter games. Since its debut in …
Read Article
How To Equip Top Ranking For Mobile Legends? If you’re a fan of Mobile Legends and aspire to reach the top ranking in the game, you’ve come to the …
Read Article
How To Get Blackstone In Minecraft? Minecraft is a sandbox game that allows players to explore and create their own virtual worlds. One of the key …
Read Article
Why Is Among Us Not Working? Among Us, the popular online multiplayer game developed by InnerSloth, has gained a massive following since its release. …
Read Article


