


What Genshin Impact Characters Are Free? Find Out Here!
What Genshin Impact Characters Are Free? In the world of Genshin Impact, players are introduced to a vast and expansive landscape filled with unique …
Read Article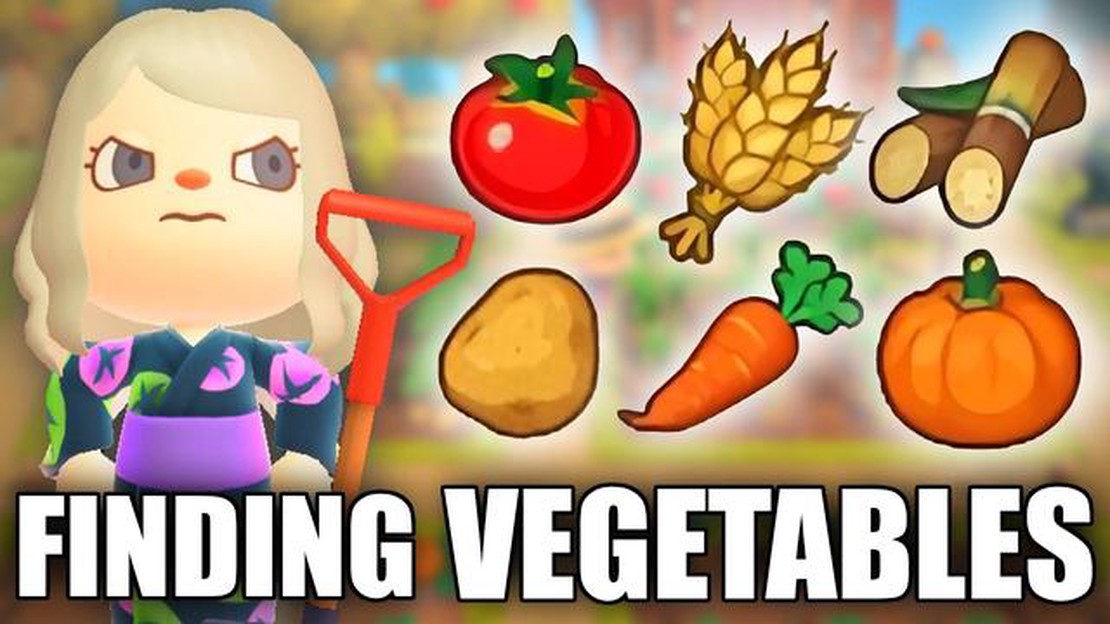
Animal Crossing is a popular video game where players can create their own virtual world and live a peaceful life. One of the activities in Animal Crossing is farming, which involves growing and harvesting various crops, including vegetables. Getting vegetables in Animal Crossing can be a fun and rewarding experience, and this guide will walk you through the steps on how to do it.
Step 1: Obtaining vegetables
The first step in getting vegetables in Animal Crossing is to obtain the seeds. Seeds can be acquired through various methods, such as buying them from the in-game store, receiving them as gifts from other characters, or finding them in mystery islands. Once you have the seeds, you can proceed to the next step.
Step 2: Planting the seeds
Once you have obtained the seeds, it’s time to plant them. Find a suitable spot in your virtual world where you want to grow your vegetables. Make sure the spot has enough space and sunlight for the crops to thrive. Dig a hole and plant the seeds carefully. You can plant multiple seeds to increase your chances of a successful harvest.
Tip: Some vegetables require specific conditions to grow, such as being planted during a certain season or requiring a specific type of soil. Make sure to read the seed packet or consult the in-game guide for more information.
Step 3: Taking care of the crops
Once the seeds are planted, it’s important to take care of the crops to ensure a bountiful harvest. This includes watering the plants regularly, removing weeds that may hinder their growth, and protecting them from pests. Additionally, you can use fertilizers or plant food to enhance the growth of your vegetables.
Step 4: Harvesting the vegetables
After a certain period of time, your vegetables will be ready to be harvested. This can vary depending on the type of vegetable you are growing. The game will indicate when the vegetables are ripe for picking. Use a shovel or any other suitable tool to dig up the vegetables from the ground. Collect them and store them in your inventory or use them for cooking, selling, or trading with other players.
Conclusion
Getting vegetables in Animal Crossing can be a fun and rewarding experience. By following the steps in this guide, you will be able to grow your own crops and enjoy the fruits of your labor. Remember to take care of your plants and create a thriving farm in your virtual world. Happy harvesting!
If you’re looking to add a little more variety to your island in Animal Crossing, why not try growing your own vegetables? Not only will this give you access to new and delicious ingredients for cooking, but it will also add a touch of greenery to your landscape. Here’s a guide on how to plant and grow vegetables in Animal Crossing:
The first step in growing vegetables is to obtain seeds. Seeds can be purchased from Nook’s Cranny or Leif’s Garden Shop. The available selection may vary on different days, so be sure to check back frequently to see what’s available. You can also trade with other players or visit other islands to find different types of seeds.
Once you have your seeds, find a suitable spot on your island to plant them. Clear any weeds or other obstacles in the area and make sure there is enough space for the plants to grow. You can use a shovel to dig holes for the seeds, or you can use the new vegetable planters introduced in the latest update.
Take your seeds and plant them in the holes or planters. Follow the instructions on the seed packet to determine the appropriate planting depth and spacing. Be sure to water the newly planted seeds with your watering can to help them grow.
Read Also: Learn How to Earn Free Turkeys on Fortnite and Level Up Your Game | [Website Name]
To ensure healthy growth, make sure to water your plants regularly. You can do this by using your watering can or by waiting for rain. Additionally, you’ll need to remove any weeds that sprout up near your vegetables to prevent them from competing for nutrients. Remember to check on your plants each day to make sure they are progressing as expected.
After a few days of tending to your plants, you’ll notice that they start to produce vegetables. Each plant has its own growth period, so be patient and monitor their progress. Once the vegetables are ready, you can harvest them by pressing the B button to pick them up.
With your freshly harvested vegetables, you can now use them in a variety of ways. Some recipes require specific vegetables, while others allow you to mix and match. Experiment with different combinations to discover new dishes and flavors. You can also sell any excess vegetables to make some extra Bells.
By following these steps, you’ll be able to plant and grow your own vegetables in Animal Crossing. Enjoy the process of nurturing your plants and reaping the rewards of a bountiful harvest.
Obtaining vegetable seeds in Animal Crossing is an essential step in growing your own garden. Vegetable seeds can be obtained in several ways, and each method has its own advantages.
The most common way to obtain vegetable seeds is by purchasing them from the garden shop. The garden shop usually offers a variety of vegetable seeds for sale, including tomatoes, pumpkins, carrots, and more. Simply visit the garden shop and check their inventory to see what seeds are available for purchase.
Read Also: How to Use a Calling Card in Animal Crossing: A Step-by-Step Guide
Note: The availability of vegetable seeds in the garden shop may vary depending on the season and the day of the week. Some vegetable seeds may only be available during specific seasons, so be sure to check back regularly to see if any new seeds are in stock.
Another way to obtain vegetable seeds is by visiting mystery tour islands. Mystery tour islands are randomly generated islands that you can visit using a Nook Miles Ticket. While exploring these islands, you may come across villagers who are willing to trade vegetable seeds with you. Keep in mind that not all mystery tour islands will have villagers offering seeds, so it may take some time and luck to find the seeds you need.
If you have friends who also play Animal Crossing, you can trade vegetable seeds with them. Simply visit their island or invite them to your island and discuss which seeds you would like to exchange. Trading with friends can be a great way to get access to specific vegetable seeds that may not be available in your garden shop.
Occasionally, you may come across island tours organized by other players or online communities. These island tours often include opportunities to obtain rare or hard-to-find items, including vegetable seeds. Participating in island tours can be a fun and exciting way to collect different types of vegetables for your garden.
When Leif visits your island, he will often sell seed bags that contain a variety of vegetable seeds. Leif typically appears during specific seasons or events, so keep an eye out for his visits. Purchasing seed bags from Leif is a convenient way to quickly expand your collection of vegetable seeds.
By obtaining vegetable seeds through these various methods, you can create a diverse and thriving garden in Animal Crossing. Experiment with different vegetables and enjoy watching them grow!
Creating a vegetable garden in Animal Crossing is a fun and rewarding activity that allows you to grow your own fruits and vegetables. Here are some steps to help you get started:
With these steps, you’ll be well on your way to creating a thriving vegetable garden in Animal Crossing. Happy farming!
Proper care and maintenance are crucial for growing healthy and bountiful vegetables in Animal Crossing. Here are some tips to help you take care of your crops:
Remember to take good care of your vegetables, and they will reward you with delicious ingredients that you can use in cooking or sell for a profit.
You can find vegetables in Animal Crossing by growing them yourself on your island. You can buy seeds from Tom Nook’s store or from Leif, the sloth who occasionally visits your island.
To grow vegetables in Animal Crossing, you need to first buy seeds from Tom Nook’s store or Leif. Then, you’ll need to find a suitable spot on your island to plant the seeds. After planting them, make sure to water them every day and they will eventually grow into fully-grown vegetables.
In Animal Crossing, you can grow a variety of vegetables, including tomatoes, pumpkins, carrots, potatoes, and more. Each vegetable has its own unique look and selling price, so make sure to experiment and see which ones you like best.
Yes, you can sell vegetables in Animal Crossing for bells. You can either sell them directly to the Nook’s Cranny store, or you can sell them to other players on your island through the Dodo code system. Selling vegetables is a great way to earn extra bells and expand your island.
The time it takes for vegetables to grow in Animal Crossing varies depending on the type of vegetable. Some vegetables, like tomatoes, can be harvested in as little as 4 days, while others, like pumpkins, can take up to 12 days to fully grow. Make sure to check in on your vegetables every day and monitor their growth progress.
What Genshin Impact Characters Are Free? In the world of Genshin Impact, players are introduced to a vast and expansive landscape filled with unique …
Read Article
How To Make Among Us Cake? Among Us has become a popular online game that has taken the gaming world by storm. Its cute and colorful characters have …
Read Article
File to have Skins of Among Us Free [Among us file-to-have-skins-of-among-us-free] Are you tired of playing Among Us with the same old skins? Do you …
Read Article
When Will Fortnite Season 5 End? Fortnite Season 5 has been an exciting journey for players, introducing new features, collaborations, and challenges. …
Read Article
When Does Call Of Duty Ww2 Beta Come Out? One of the most anticipated games of the year, Call of Duty WW2, is finally set to release its beta version. …
Read Article
How to get Terminator on Fortnite With the release of the latest season of Fortnite, players have been eagerly anticipating the arrival of the iconic …
Read Article


