


Learn How To Connect Coin Master To App Station with These Simple Steps
How To Connect Coin Master To App Station? If you are a fan of Coin Master and love playing the game, you might be interested in connecting it to App …
Read Article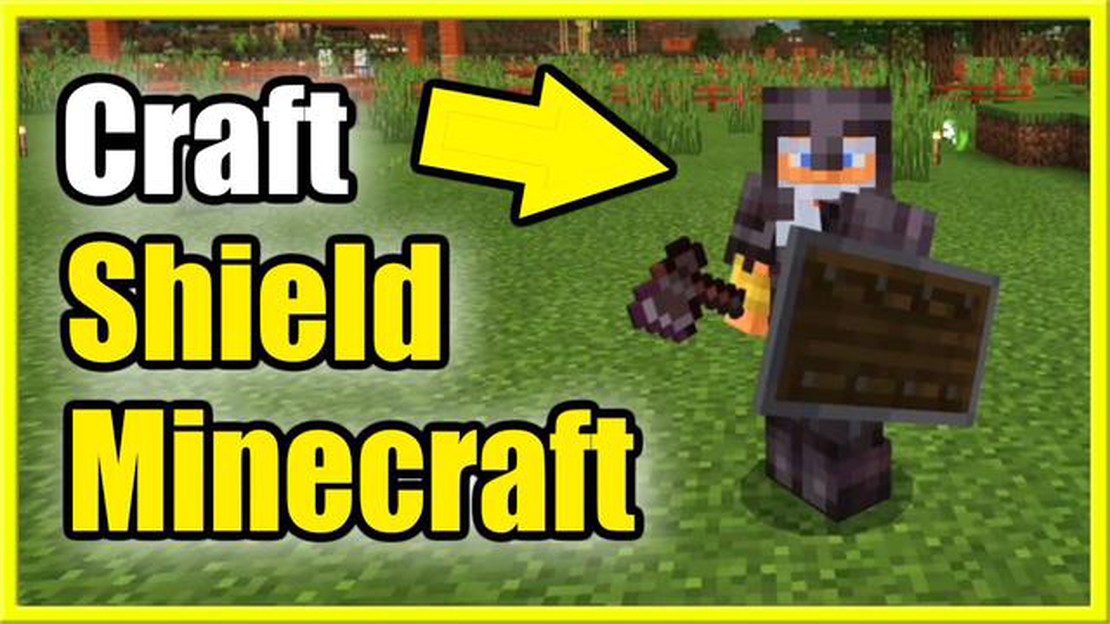
If you’re a fan of the popular game Minecraft, you probably know how important it is to protect yourself from enemies and other players. One of the best ways to do this is by crafting a shield. In this step-by-step guide, we’ll show you exactly how to make a shield in Minecraft.
First, you’ll need to gather the necessary materials. To craft a shield, you will need 6 wooden planks and 1 iron ingot. Wooden planks can be obtained by crafting wooden logs in a crafting table, and iron ingots can be obtained by smelting iron ore in a furnace. Once you have these materials, you’re ready to start crafting your shield.
To begin, open your crafting table. The crafting table can be created by placing 4 wooden planks in a square shape in your inventory. Once you have your crafting table, place it down in the world by right-clicking on the ground. Now, right-click on the crafting table to open it.
In the crafting table menu, you’ll see a 3x3 grid. Place 6 wooden planks in the bottom two rows of the grid, leaving the top row empty. Then, place the iron ingot in the center square of the grid. Once you’ve done this, a shield will appear in the result box to the right of the grid.
Now that you’ve crafted your shield, it’s time to equip it. To do this, simply drag the shield from the result box into your inventory. Once it’s in your inventory, you can equip it by selecting it from your hotbar and right-clicking. The shield will appear in your left-hand slot, protecting you from enemy attacks.
Congratulations, you’ve successfully crafted and equipped a shield in Minecraft! Now you can defend yourself from enemies and explore the world with confidence. Remember, the shield will only protect you from attacks coming from the front, so be sure to keep an eye on your surroundings and stay alert.
In Minecraft, shields are an essential tool that can protect you from incoming attacks. They are useful for blocking projectiles and reducing the damage you take in combat. In this step-by-step guide, we will show you how to make a shield in Minecraft.
To make a shield, you will need the following materials:
To open the crafting menu, press the “E” key on your keyboard. This will bring up a 3x3 grid where you can place your materials to create items.
In the crafting menu, arrange the materials in the following pattern:
| ***** | *** | ** *** |
| *** ** | iron ingot | ** *** |
| *** ** | plank | ** *** |
Note: “*” represents empty spaces in the crafting grid.
Once you have arranged the materials in the correct pattern, you will see the shield appear in the result box of the crafting menu. Drag the shield into your inventory to take it.
To use the shield, equip it in your off-hand slot. Press and hold the right mouse button to raise the shield and block incoming attacks. Keep in mind that the shield has a durability bar that decreases with use, so it will eventually break and need to be repaired or replaced.
Read Also: How to Make Money Playing Call of Duty Mobile: A Comprehensive Guide
Now that you know how to make a shield in Minecraft, you can better protect yourself during combat and exploration. Good luck!
Before you can make a shield in Minecraft, you will need to gather the necessary materials. The materials you will need are:
Once you have gathered these materials, you can move on to crafting the shield.
To craft a shield in Minecraft, you will need the following materials:
Read Also: Upgrade Your Shovel and Clear Wildebeest Bones in Disney Dreamlight Valley
Once you have gathered all the necessary materials, follow these steps to craft a shield:
| Wooden Plank | ||
| Wooden Plank | Iron Ingot | Wooden Plank |
| Wooden Plank |
Note: The iron ingot should be placed in the center slot of the crafting grid, and the wooden planks should surround it.
Congratulations! You have successfully crafted a shield in Minecraft. You can now equip the shield to protect yourself from enemy attacks and projectiles.
Once you have crafted a shield in Minecraft, you can equip it in your off-hand slot to protect yourself from attacks. Here are some important things to know about using the shield:
Overall, using a shield in Minecraft can greatly enhance your defensive capabilities and provide valuable protection during your adventures. Whether you’re facing off against hostile mobs or engaging in PvP battles, make sure to have a shield ready to defend yourself!
To make a Minecraft shield, you will need 6 planks of any type of wood and 1 iron ingot.
Yes, you can use any type of wood planks to make a shield in Minecraft.
You can find iron ore in caves and mine it with a stone pickaxe or higher. Smelt the iron ore in a furnace to get iron ingots.
To craft a shield, place 6 planks of wood in the top two rows of a crafting table, and place 1 iron ingot in the center square of the middle row.
Yes, you can enchant a Minecraft shield using an enchanting table or an anvil. Some enchantments you can apply to a shield include Unbreaking, Mending, and Curse of Binding.
No, currently in Minecraft, shields cannot be dyed or have any additional designs on them.
Shields in Minecraft can be used to block attacks from enemies, but they can also be used to block projectiles like arrows and ghast fireballs.
How To Connect Coin Master To App Station? If you are a fan of Coin Master and love playing the game, you might be interested in connecting it to App …
Read Article
Park Beyond review Welcome to our in-depth review of Park Beyond, the exciting new theme park game that has been generating a lot of buzz in the …
Read Article
Names for Base Fortnite Choosing the right name for your Fortnite base is important. It not only represents your creativity, but also has an impact on …
Read Article
What Does Curse Of Vanishing Do In Minecraft? The Curse of Vanishing is a unique enchantment in Minecraft that adds an intriguing element to the game. …
Read Article
Clash Royale How To Change Arena? Clash Royale is a popular mobile game developed by Supercell, where players battle it out in real-time duels. One of …
Read Article
Which Starter Pokemon Are You? Are you a fan of Pokemon? Have you ever wondered which Starter Pokemon you would be if you were in the Pokemon world? …
Read Article


