


Discover the Impressive Download Numbers of Call Of Duty Mobile
How Many Downloads Does Call Of Duty Mobile Have? Call of Duty Mobile has taken the gaming world by storm since its release in October 2019. The game, …
Read Article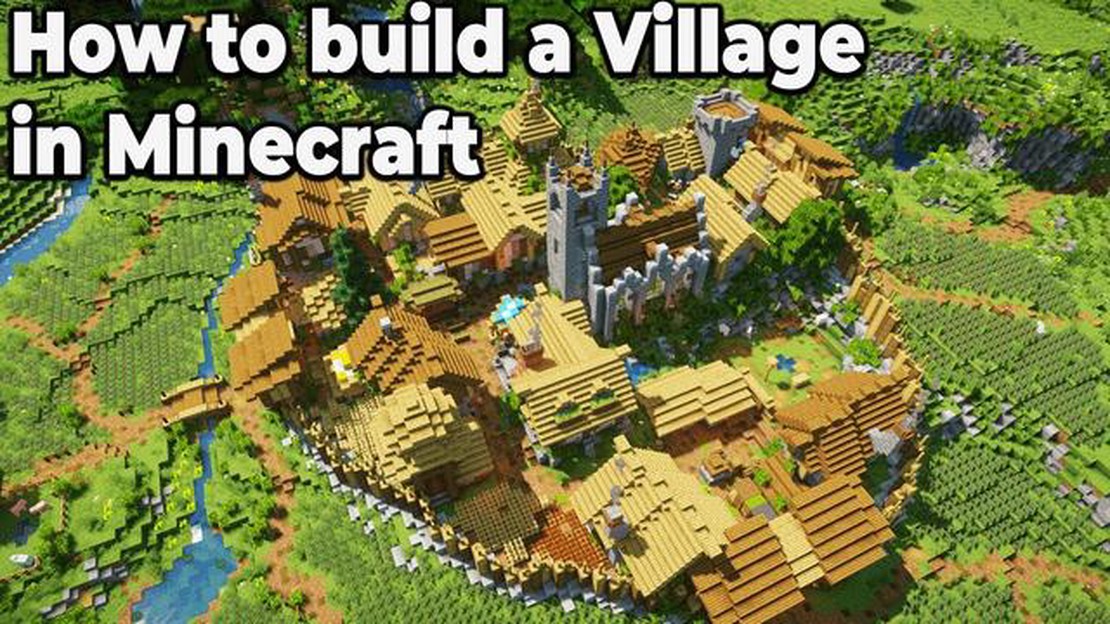
Are you a fan of Minecraft and want to create your own village in the game? Building a village in Minecraft can be a fun and rewarding experience, allowing you to create a bustling community of villagers and unique structures. In this step-by-step guide, we will walk you through the process of creating your own village in Minecraft.
First, you will need to find a suitable location for your village. Look for a flat area with enough space to accommodate multiple structures, such as houses, farms, and other community buildings. It’s also a good idea to choose a location near a water source, as villagers will need access to water for farming.
Once you have found the perfect location, start by building the necessary structures for your village. Begin with a central meeting point, such as a town square or a plaza. You can use different blocks and materials to add a unique touch to your village, so get creative with your designs.
Next, you will need to build houses for the villagers to live in. Make sure to include enough houses to accommodate all the villagers you want to have in your village. You can use a variety of materials and designs to make each house unique. Consider adding doors, windows, and even gardens to make the houses look more realistic.
Remember to leave enough space between each house to allow villagers to move around freely and access their homes easily. This will also make your village look more organized and aesthetically pleasing.
In addition to houses, you can also build other community buildings, such as a blacksmith, a library, or a church. These structures not only add depth to your village but also provide useful features for the villagers. For example, a blacksmith can provide tools and weapons, while a library can offer enchanting opportunities.
Once you have built the necessary structures, it’s time to populate your village with villagers. You can do this by either curing zombie villagers or by breeding existing villagers. Curing zombie villagers requires the use of a golden apple and a splash potion of weakness, while breeding requires specific conditions, such as having enough beds and food.
Lastly, make sure to protect your village from hostile mobs by building walls or fences around it. This will help keep your villagers safe and prevent any unwanted attacks. You can also consider lighting up the village with torches or lanterns to further enhance its safety.
With these steps, you are well on your way to creating your own village in Minecraft. Remember to have fun and let your creativity shine through as you build and customize your village. Happy crafting!
When creating a village in Minecraft, the first step is to choose a suitable location. This is an essential part of the process, as the success of the village will depend on its surroundings.
To select a location, consider the following factors:
Once you have considered these factors, you can begin the process of creating your Minecraft village.
When creating a village in Minecraft, the first step is to find a flat area where you can build your village. Look for a location that has enough space to accommodate all the buildings and structures you plan to add. Flat ground is ideal as it makes construction easier and allows for better planning and organization of the village layout.
Read Also: When Is Minecraft 1.17 Coming Out? Latest Updates and Release Date
To find a flat area, you can explore your Minecraft world and search for large open plains or plateaus. These areas typically have level terrain and provide a solid foundation for building. You can also use the “/locate” command to find a village or desert temple, as these structures are often found in flat areas.
Once you’ve found a suitable flat area, it’s time to start planning and building your village. Consider the size and layout of the buildings, the location of roads and pathways, and the placement of essential structures such as farms, wells, and houses. With careful planning, you can create a well-designed and functional village in Minecraft.
When you’re ready to create your village in Minecraft, the first thing you need to do is choose a biome. Biomes are different types of environments in the game that have their own unique features and resources. Each biome has its own set of characteristics, such as temperature, terrain, and available resources.
To create a village, it’s important to choose a biome that provides a good environment for your villagers to thrive. Here are some of the most popular biomes for creating villages:
Read Also: Understanding Star Levels in Clash Royale: A Complete Guide
Once you’ve chosen a biome, it’s time to start building your village. Consider the unique characteristics and resources of your chosen biome when designing and planning your village. This will help ensure the success and sustainability of your village.
In order to create a village in Minecraft, you will need to gather certain resources that will be used to build houses, farms, and other structures. Here is a list of the essential resources you will need:
Make sure to gather enough of each resource before moving on to the next step. A well-stocked inventory will help you quickly build and expand your village.
Before you start building a village in Minecraft, you will need to gather the necessary building materials. These materials will be used to construct various structures and create the village’s overall design and layout.
Here are some common building materials you will need:
Additionally, you may also need other materials such as doors, torches, beds, and crafting tables to furnish the buildings within the village.
Make sure to gather a sufficient amount of each building material before you begin constructing your village. This will ensure that you have all the necessary resources to complete your project without running out in the middle of construction.
Yes, you can make a village in Minecraft by following various steps.
You will need materials such as wood, cobblestone, glass, doors, and beds to create houses in your village.
To start making a village in Minecraft, you need to select a suitable location for your village and then build houses, farms, and other structures to create a thriving community.
To attract villagers to your village in Minecraft, you can build houses, create farms for crops, and place job blocks such as a lectern for librarians or a brewing stand for clerics.
Villagers provide various benefits in Minecraft, such as trading items, offering enchanted books, and providing quests for the player to complete.
How Many Downloads Does Call Of Duty Mobile Have? Call of Duty Mobile has taken the gaming world by storm since its release in October 2019. The game, …
Read Article
How To Eat In Genshin Impact? Genshin Impact is an open-world action role-playing game that has taken the gaming world by storm. With its stunning …
Read Article
Coordinates cannot be seen in Minecraft Minecraft is a popular sandbox game that allows players to explore and create their own virtual worlds. One of …
Read Article
What Is Good Against Normal Pokemon? Normal-type Pokemon are some of the most common and versatile in the game. With a lack of major weaknesses, they …
Read Article
How to Copy Fortnite from one PC to another Fortnite is one of the most popular online multiplayer games, and if you’re planning to play it on a …
Read Article
How To Get Sponges In Minecraft? In the popular game Minecraft, sponges are a valuable resource that can be used for a variety of purposes. They can …
Read Article


