


How to Unlock Silver Surfer in Fortnite - Step-by-Step Guide
How to get Silver Surfer in Fortnite The popular Marvel superhero, Silver Surfer, has made his way into the world of Fortnite. Players now have the …
Read Article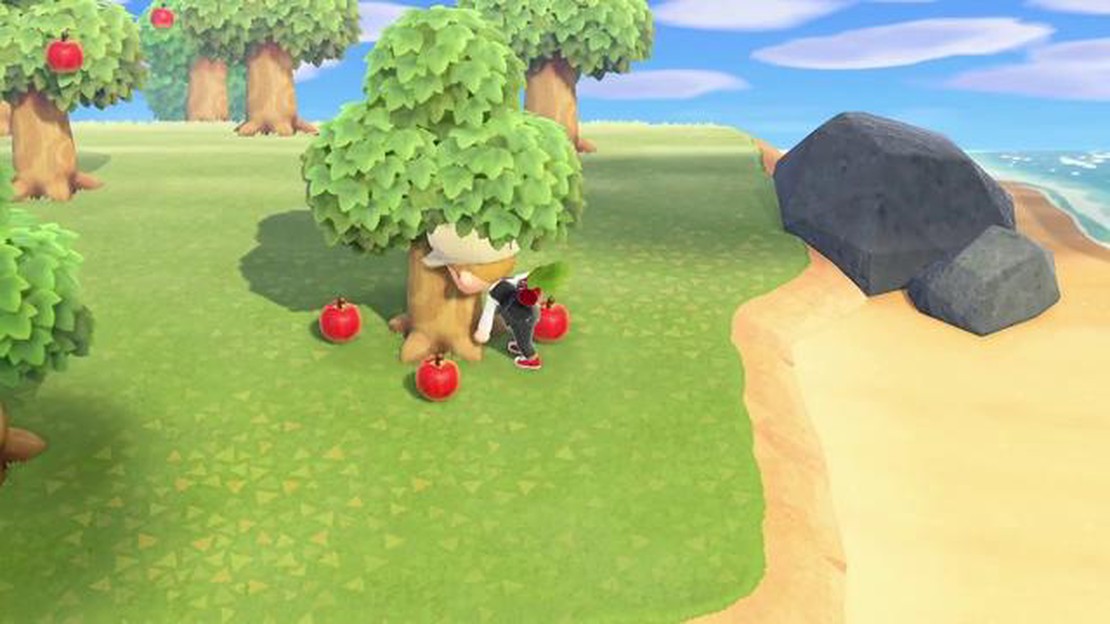
If you’re a fan of the popular simulation game, Animal Crossing, you know that one of the key elements of gameplay is planting and growing fruit trees. Fruit trees not only provide a source of income in the game, but they also add a beautiful touch to your virtual island. In this step-by-step guide, we’ll show you how to plant fruit trees in Animal Crossing.
Step 1: Gather Fruit
To begin, you’ll need to gather some fruit. You can do this by either visiting other players’ islands and shaking their fruit trees, or by visiting the deserted islands using Nook Miles Tickets. Collect as much fruit as you can, as you’ll need it to plant your own trees.
Step 2: Clear a Space
Next, find an area on your island where you want to plant your fruit trees. Make sure the area is clear of any obstacles such as rocks, flowers, or other trees. This will give your fruit trees the best chance to grow and thrive.
Step 3: Dig a Hole
Using your shovel, dig a hole in the spot where you want to plant your fruit tree. The hole should be one space away from any other trees or buildings, and it should be deep enough to hold the sapling.
Step 4: Plant the Sapling
Take the fruit you gathered in step 1 and select it from your inventory. Choose the “Plant” option and then select the hole you dug in step 3. The sapling will be planted, and a small tree will begin to grow.
Step 5: Water and Wait
After planting your fruit tree, make sure to water it every day to help it grow faster. You can do this by using your watering can on the tree. It will take a few days for the tree to grow and bear fruit, so be patient and continue to care for it.
Step 6: Harvest and Repeat
Once your fruit tree has grown and is bearing fruit, you can harvest the fruit by shaking the tree. The fruit can be sold to make money in the game or used in various recipes. Remember to plant new fruit trees to continue growing your orchard and expanding your island’s beauty.
Read Also: Why Isn't Fortnite on the App Store? The Reasons Behind the Absence of Fortnite from Apple's App Store
By following these simple steps, you’ll be able to plant and grow fruit trees in Animal Crossing. Enjoy the process of watching your trees grow and the satisfaction of harvesting your own delicious fruit!
Planting fruit trees in Animal Crossing is a fun and rewarding activity that can provide you with a steady supply of fruit in the game. Follow these steps to successfully plant fruit trees and enjoy the benefits they bring.
Read Also: Choosing the Perfect Name for Your Animal Crossing Island: Tips and Ideas
By following these steps, you can have a thriving orchard in Animal Crossing and enjoy the beauty and benefits of your fruit trees. Happy planting!
Planting fruit trees in Animal Crossing requires some careful planning to ensure they grow and produce fruit efficiently. Here are some key factors to consider when choosing the perfect spot for your fruit trees:
Remember to plan ahead and leave enough space for future expansion. As your fruit trees grow, they will need more space to spread their branches and produce more fruit. By considering these factors when choosing the spot for your fruit trees, you will set them up for success and enjoy a bountiful harvest in Animal Crossing.
Before you start planting fruit trees in Animal Crossing, it’s important to prepare the ground properly to ensure their successful growth. Here are the steps you need to follow:
Now that you have prepared the ground, you are ready to plant your fruit tree in Animal Crossing. Follow the next steps to complete the planting process.
Planting fruit trees in Animal Crossing is a simple process that can yield delicious rewards. Follow these steps to ensure your fruit trees grow strong and healthy:
By following these steps, you can successfully plant and grow fruit trees in Animal Crossing. Enjoy the beauty of your orchard and the tasty fruits it produces!
The purpose of planting fruit trees in Animal Crossing is to have a renewable source of fruit that you can use for crafting, eating, or selling.
To plant a fruit tree in Animal Crossing, you need to dig a hole with a shovel, then select the fruit from your inventory and choose the “Plant” option when standing next to the hole. Finally, you need to water the planted hole with a watering can.
You can find fruit in Animal Crossing by shaking trees. There are usually a few fruit trees on your island or you can visit other players’ islands and shake their trees to get fruit.
A fruit tree in Animal Crossing takes about 3 days to grow fully.
How to get Silver Surfer in Fortnite The popular Marvel superhero, Silver Surfer, has made his way into the world of Fortnite. Players now have the …
Read Article
Horizon Zero Dawn review In the highly anticipated game, Horizon Zero Dawn, players are transported to a breathtaking post-apocalyptic world where …
Read Article
Bandai Namco games are coming to GeForce Now. But no, not Elden Ring Bandai Namco Entertainment has announced that it is bringing its games to the …
Read Article
How To Unlock Ice Wizard Clash Royale? Clash Royale is a popular mobile game that combines strategy and card collection. It features a range of …
Read Article
How To Get Capes In Minecraft? Minecraft is a popular sandbox game that allows players to create and explore their own virtual worlds. One of the ways …
Read Article
When Is Call Of Duty Infinite Warfare? Call of Duty Infinite Warfare, the latest installment in the popular video game franchise, is set to be …
Read Article


