


The Origins of the Valve Logo: Uncovering the Mystery of ' the Bald Guy'
Valve logo origins: who is ’the bald guy?' Valve, the renowned video game developer and creator of popular game franchises like Half-Life and Portal, …
Read Article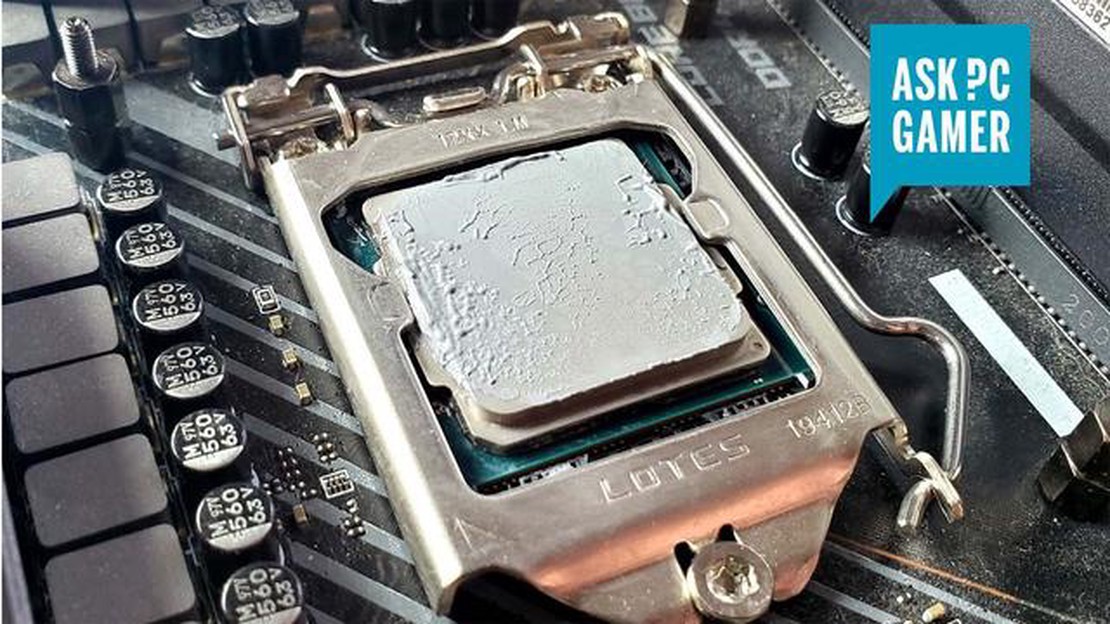
Thermal paste is a crucial component when it comes to the efficient cooling of computer hardware, such as CPUs and GPUs. Over time, however, thermal paste can become dry, dirty, or simply ineffective, resulting in poor heat transfer and potential damage to your system. In order to maintain optimal cooling performance, it is important to periodically remove and replace the thermal paste. This step-by-step guide will walk you through the process of removing thermal paste from your hardware quickly and cleanly.
Step 1: Gather the necessary tools
Before you begin, make sure you have all the tools you will need for the job. This includes a thermal paste remover or isopropyl alcohol, cotton swabs or soft cloth, a plastic scraper or a credit card, and some tissue or paper towels. These tools will help you effectively remove the existing thermal paste without causing any damage to your hardware.
Step 2: Prepare the hardware
Prior to removing the thermal paste, it is important to power off and unplug your computer. This will prevent any accidents and protect both you and your hardware. Once your computer is safely turned off and disconnected, carefully remove the heatsink or cooling system that is currently installed on the component with the thermal paste. This will allow you to access the thermal paste and clean it more efficiently.
Step 3: Apply the thermal paste remover
The thermal paste remover or isopropyl alcohol will help dissolve and break down the existing thermal paste. Apply a small amount of the remover or alcohol onto a cotton swab or soft cloth, and gently rub it onto the thermal paste. This will soften the paste and make it easier to remove. Be sure to avoid excessive rubbing or using too much liquid, as it can potentially damage your hardware.
Step 4: Clean the surface
Once the thermal paste has been loosened, use a plastic scraper or credit card to gently scrape off the paste from the surface of the component. Be cautious and careful not to apply too much force or scratch the surface. After removing most of the paste, use a cotton swab or soft cloth soaked in the thermal paste remover or alcohol to clean and wipe away any remaining residue. Repeat this process until the surface is completely clean.
Step 5: Let it dry and reapply
After cleaning the surface, allow it to air dry for a few minutes. This will ensure that all the alcohol or thermal paste remover has evaporated. Once the surface is dry, you can reapply a small amount of fresh thermal paste in the center of the component. Ensure to spread it evenly using a plastic scraper or your finger covered with an anti-static glove. Finally, reattach the heatsink or cooling system carefully and securely to complete the process.
By following these step-by-step instructions, you can remove thermal paste quickly and cleanly, ensuring that your computer hardware stays cool and performs optimally. Remember to exercise caution and take your time during the process to avoid any damage to your components. With a little bit of effort, you can ensure that your computer remains in top shape for years to come.
Thermal paste plays a crucial role in the cooling of electronic components, especially in devices such as computers and gaming consoles. It is a thermally conductive compound that improves the transfer of heat from the processor or GPU to the heat sink.
Over time, thermal paste can degrade and dry out, leading to decreased thermal conductivity and reduced cooling efficiency. This can result in higher operating temperatures, which can negatively impact the performance and lifespan of your hardware.
Read Also: How to Salvage Gear in Diablo 4: A Comprehensive Guide
Regularly removing and replacing thermal paste is essential to maintain optimal cooling performance. Here are a few reasons why you should make it a part of your regular maintenance routine:
Removing and replacing thermal paste can seem intimidating, but with the right tools and techniques, it can be a straightforward process. By making it a regular part of your computer maintenance routine, you can ensure optimal cooling and prolong the life of your hardware.
Before you can remove thermal paste from a surface, you will need to gather some essential tools. These tools will make the process easier and ensure that you can clean the surface thoroughly. Here are the items you will need:
Once you have gathered these tools, you will be ready to move on to the next step in the process of removing thermal paste. Having all the necessary tools at hand will ensure that you can work efficiently and effectively without any interruptions.
Before applying any thermal paste, it’s important to properly clean and prepare the surface of the CPU and heatsink. This ensures that the thermal paste can form a good bond and maximizes heat transfer between the two surfaces.
Start by using a lint-free cloth or cotton swab dipped in isopropyl alcohol to gently clean the old thermal paste from the surface of the CPU. Be careful not to apply too much pressure or scrub too hard, as this could damage the CPU. Wipe away any residue until the surface is clean and dry.
Read Also: The Lords of the Fallen: The Unexpected Name Change for Lords of the Fallen 2
Next, clean the heatsink in the same manner. Make sure to remove any dust or debris that may have accumulated on the surface. It’s important to have a clean and smooth surface for the thermal paste to adhere to.
Once the surfaces are clean, it’s time to apply the thermal paste. Depending on the type of thermal paste you’re using, you may either need to apply a small dot in the center of the CPU or spread a thin layer evenly across the entire surface. Refer to the instructions provided with your thermal paste for specific recommendations.
After applying the thermal paste, carefully reattach the heatsink to the CPU. Make sure it is aligned properly and securely fastened in place. Double-check that all screws or clips are tightened, but be careful not to overtighten, as this could damage the CPU or heatsink.
This completes the process of preparing the surface for applying thermal paste. The next step is to test and monitor the temperature of your CPU to ensure optimal cooling performance.
After removing the bulk of the thermal paste from the CPU and heatsink, it’s time to thoroughly clean the remaining residue. To do this, you’ll need to apply a cleaning solution to the surface.
There are a few different cleaning solutions that you can use, but the most common and effective option is isopropyl alcohol (also known as rubbing alcohol). Isopropyl alcohol is a commonly used solvent that quickly and effectively dissolves the thermal paste without damaging the components.
Here’s how you can apply the cleaning solution:
It’s important to note that while isopropyl alcohol is safe to use on electronic components, you should avoid using other solvents or cleaners that are not specifically designed for this purpose. These can potentially damage the components and cause malfunctions.
With the cleaning solution applied and the residue removed, you’re now ready to move on to the next step: applying a new layer of thermal paste.
Thermal paste is a compound that is applied between a computer’s CPU and its cooler to improve heat transfer. It is important because it helps to fill in microscopic imperfections on the CPU and cooler surfaces, ensuring better contact and more efficient heat dissipation.
To remove thermal paste, you will need isopropyl alcohol, cotton swabs or lint-free cloth, a plastic scraper or credit card, and some paper towels. These tools will help you clean the old thermal paste and prepare the surface for reapplication.
No, it is not recommended to reuse thermal paste after removing it. Once the thermal paste has been applied and removed, its consistency and effectiveness deteriorate. It is better to use a fresh application of thermal paste each time to ensure optimal heat transfer and cooling performance.
The frequency of thermal paste replacement depends on several factors including the type of thermal paste used, the operating conditions of the computer, and the manufacturer’s recommendations. In general, it is recommended to replace thermal paste every 1-2 years to maintain optimal heat transfer and cooling efficiency.
Valve logo origins: who is ’the bald guy?' Valve, the renowned video game developer and creator of popular game franchises like Half-Life and Portal, …
Read Article
Where To Find Growlithe In Pokemon Sword? Growlithe is a popular Fire-type Pokemon that can be a valuable addition to your team in Pokemon Sword. This …
Read Article
How To Load Mobile Legends? If you’re a fan of mobile gaming, chances are you’ve heard of Mobile Legends. This popular multiplayer online battle arena …
Read Article
How To Log Out Of Coin Master On Iphone? If you’re an avid Coin Master player on your iPhone and want to know how to log out of the game, we have some …
Read Article
How to get the wrench in Resident Evil 4 Remake Resident Evil 4 Remake is a highly anticipated upcoming game that offers players an enhanced …
Read Article
How To Add Friends In Genshin Impact? Genshin Impact is an immensely popular open-world action role-playing game developed and published by miHoYo. …
Read Article


