

How Many Among Us Colors Are There? | All Available Character Colors
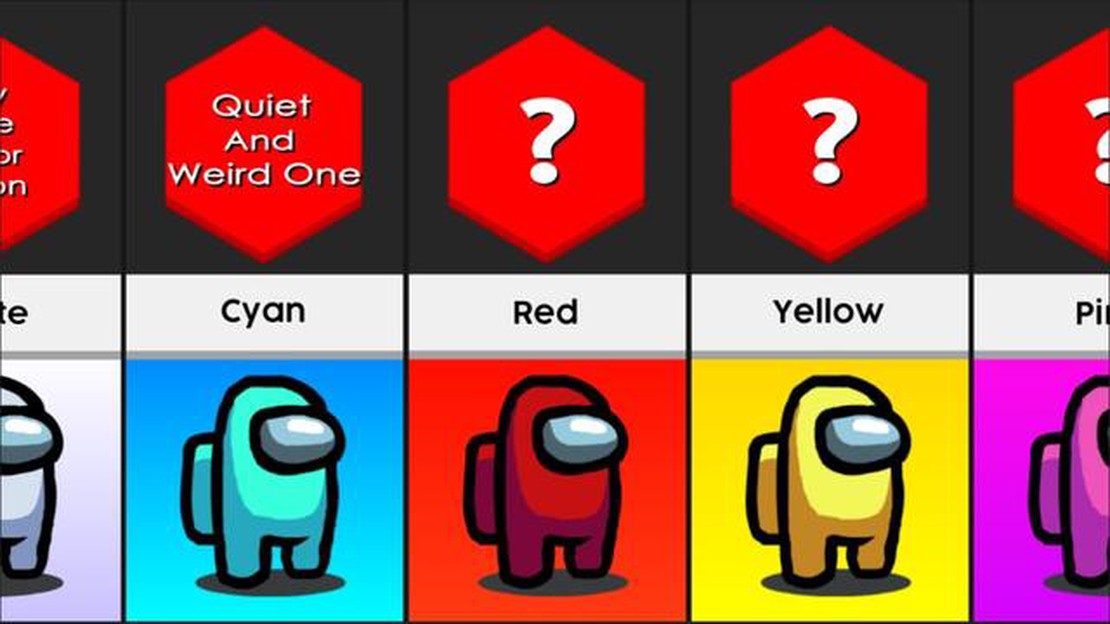
How Many Among Us Colors Are There? Among Us is a popular online multiplayer game that has taken the gaming community by storm. The game involves a …
Read Article
In order to play Minecraft with your friends over the internet, you need to set up a virtual private network (VPN) connection. One popular tool that you can use to create a VPN is called Hamachi. Hamachi allows you to create a secure connection between multiple computers, allowing you to play Minecraft together even if you are not on the same local network.
Using Hamachi in Minecraft is relatively simple, but it does require a few steps. Follow this step-by-step guide to learn how to use Hamachi to play Minecraft with your friends:
That’s it! You are now ready to play Minecraft with your friends using Hamachi. Enjoy exploring and building together in this virtual world!
If you want to play Minecraft with your friends over the internet, but don’t want to set up a dedicated server, Hamachi is a great solution. Hamachi allows you to create a virtual private network (VPN), which allows you to connect to other computers as if they were on the same local network. This means you can use Hamachi to play Minecraft with your friends, even if you’re not in the same physical location.
Here is a step-by-step guide to help you use Hamachi in Minecraft:
Read Also: Pathfinder: Wrath of the Righteous Review - An Epic RPG Adventure
Using Hamachi in Minecraft allows you to easily play with your friends, even if you don’t have access to a dedicated server. Just make sure everyone has Hamachi installed and is connected to the same network. Happy Minecrafting!
If you want to play Minecraft with your friends but don’t want to set up a dedicated server, Hamachi is a great tool that allows you to create a virtual private network (VPN) and play Minecraft multiplayer over the internet. Here’s a step-by-step guide on how to set up Hamachi for Minecraft multiplayer:
With Hamachi, you can easily set up a temporary Minecraft multiplayer server for you and your friends. Keep in mind that Hamachi has limitations, such as a maximum of five players per network and potential connection issues. If you encounter any problems, make sure to check your network settings and firewall configurations.
Hamachi is a virtual private network (VPN) program that allows players to create a local network, which enables them to play Minecraft together even if they are not on the same physical network. To use Hamachi in Minecraft, players need to install the Hamachi software, create a new network, invite their friends to join the network, and finally, launch Minecraft and connect to the same network.
Read Also: Learn How to Draw Among Us Hats Step by Step
Yes, Hamachi offers a free version that can be used for personal purposes. However, there is also a paid version called Hamachi LogMeIn that offers additional features and support.
Yes, Hamachi can be used for other games as well. It creates a virtual network that allows players to connect to each other as if they were on the same local network, making it possible to play games together. However, it is important to note that not all games are compatible with Hamachi, so it is always a good idea to check the game’s requirements and compatibility before attempting to use Hamachi.
Yes, there are several alternatives to Hamachi for playing Minecraft with friends. Some popular alternatives include Evolve, Tunngle, and GameRanger. These programs also create virtual networks that allow players to connect to each other and play games together. However, just like with Hamachi, it is important to check the compatibility of the alternative program with Minecraft before using it.
How Many Among Us Colors Are There? Among Us is a popular online multiplayer game that has taken the gaming community by storm. The game involves a …
Read Article
How To Play Fortnite? Welcome to the world of Fortnite, where battles are fought, strategies are crafted, and victory is pursued! Whether you’re new …
Read Article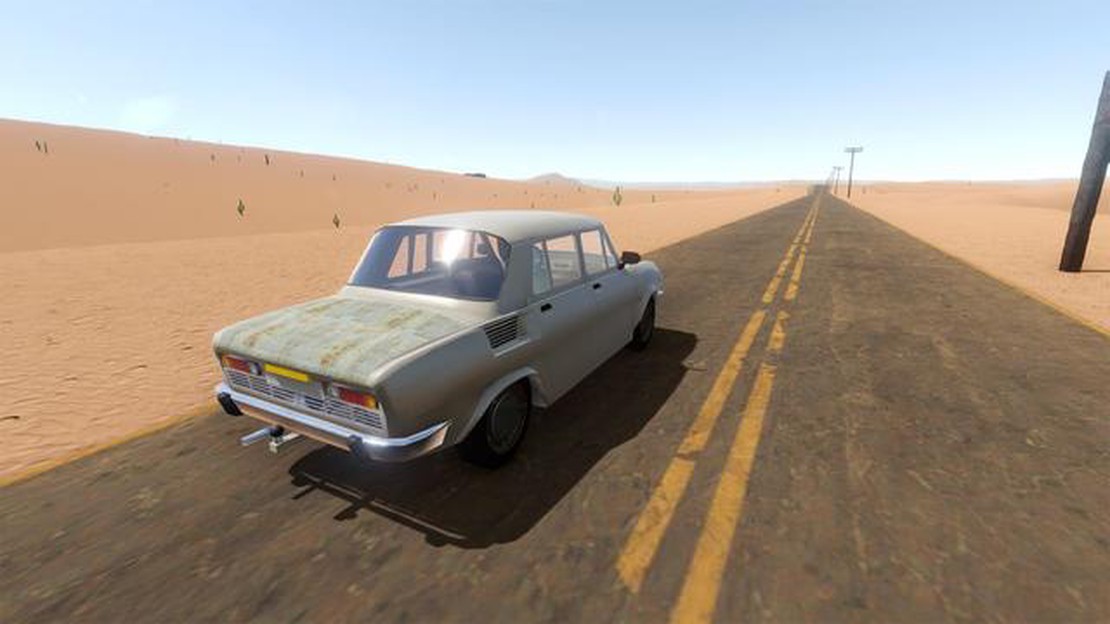
The Long Drive is a lonely road trip through an endless desert Imagine embarking on a journey through a vast and desolate landscape, where the sun …
Read Article
How Many Pokemon Are In Sword And Shield? Pokemon Sword and Shield, the latest installments in the beloved Pokemon franchise, have taken the gaming …
Read Article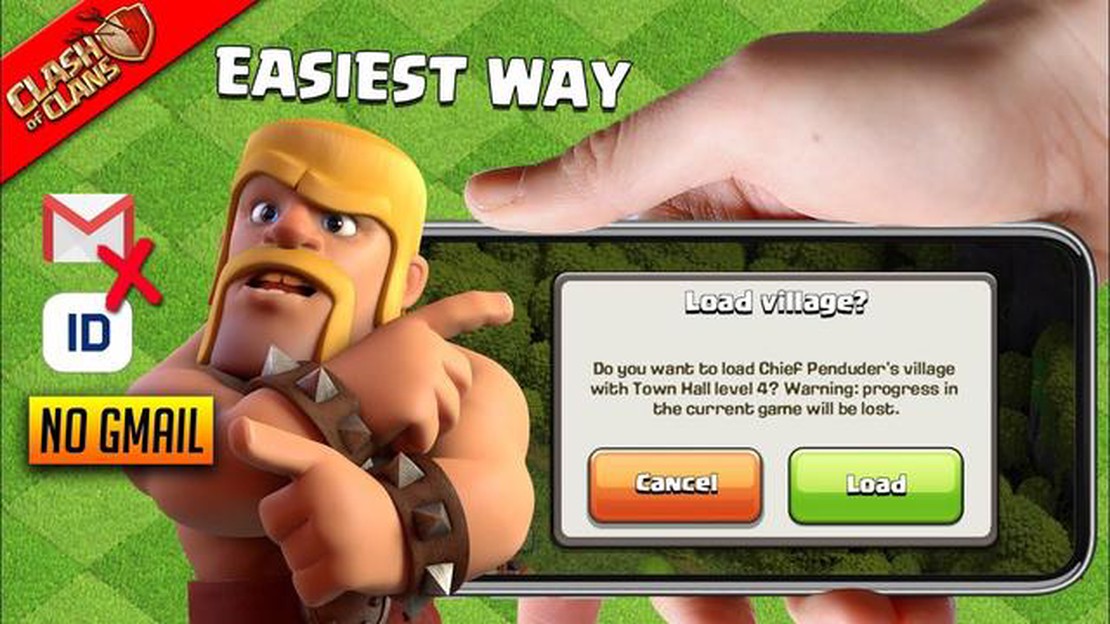
How To Recover A Clash Of Clans Account? If you’re an avid player of Clash of Clans and have unfortunately lost access to your account, don’t worry! …
Read Article
Lead designer at Naughty Dog says Star Wars Battlefront 3 was ’legit incredible’ and LucasArts cancelling it was ‘an absolute crime’ In a recent …
Read Article


