


Roblox Egg Hunt 2022 Release Date Revealed: When Can You Join the Easter Adventure?
When Is Roblox Egg Hunt 2022 Coming Out? Roblox fans, get ready for an egg-citing adventure this Easter! The highly anticipated Roblox Egg Hunt 2022 …
Read Article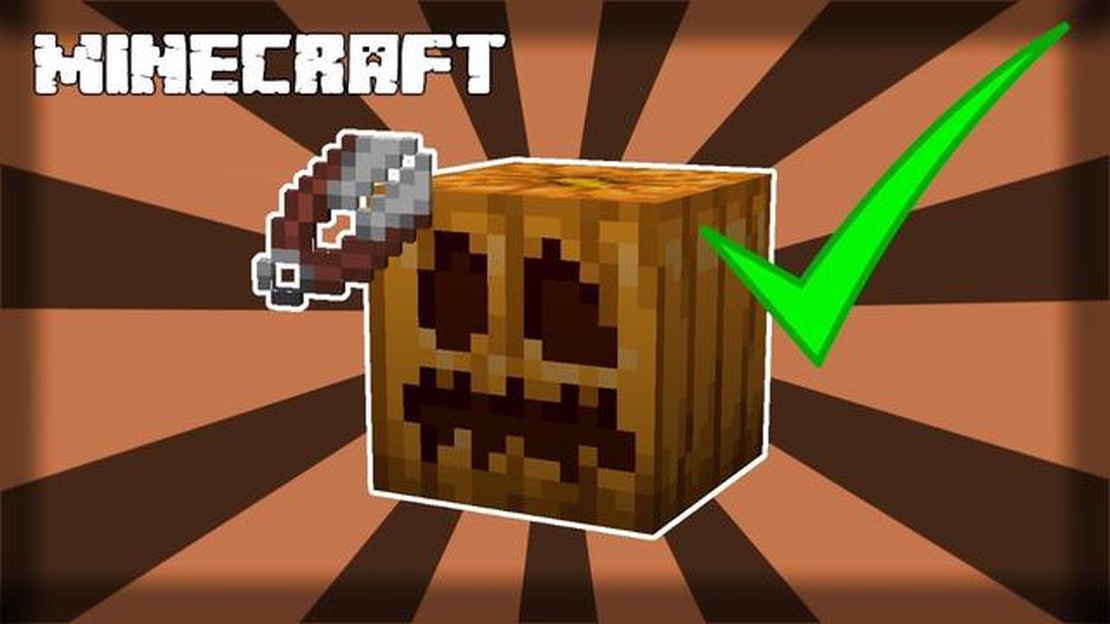
If you’re a fan of Minecraft, you’ve probably seen the iconic pumpkin face that pops up during the Halloween season. Carving a pumpkin in Minecraft is not only a fun way to express your creativity, but it can also add a spooky touch to your virtual world. In this step-by-step guide, we will show you how to carve a pumpkin in Minecraft like a pro.
Step 1: Gather the necessary materials
Before you start carving, make sure you have all the materials you’ll need. You will need a pumpkin, a crafting table, and a carving tool. If you don’t have a carving tool, you can use any tool with the “Shears” enchantment.
Step 2: Find a suitable location
Next, find a suitable location in your Minecraft world to carve your pumpkin. It can be in your house, your garden, or even in a spooky Halloween-themed area. Just make sure you have enough space to work comfortably.
Step 3: Craft the Pumpkin
Open your crafting table and place the pumpkin in the center slot. This will give you four pumpkin seeds. You can use these seeds to grow more pumpkins in the future.
Step 4: Carve the Pumpkin
Now it’s time to carve your pumpkin. Right-click on the carved pumpkin to open the pumpkin carving interface. Here, you can choose from a variety of different faces and designs to carve into your pumpkin. Use the carving tool or shears to select the desired design and carefully carve it onto the pumpkin.
Step 5: Enjoy your carved pumpkin
Once you’ve finished carving your pumpkin, you can place it anywhere in your Minecraft world. It will emit a spooky light and add a festive touch to your surroundings. You can also use the carved pumpkin to create jack-o’-lanterns or as a decorative item for Halloween-themed builds.
Tip: Experiment with different faces and designs to create unique pumpkins. You can even try replicating famous Minecraft characters or symbols for a personalized touch.
Now that you know how to carve a pumpkin in Minecraft like a pro, go ahead and bring some Halloween spirit to your virtual world. Happy carving!
Carving pumpkins in Minecraft can be a fun and creative way to decorate your virtual world. Whether you want to add some spooky Halloween vibes or simply enhance the aesthetics of your build, this step-by-step guide will teach you how to carve a pumpkin like a pro in Minecraft.
Step 1: Gather Materials
To carve a pumpkin in Minecraft, you will need the following materials:
Step 2: Craft a Jack-o’-Lantern
Before you can start carving, you’ll need to craft a Jack-o’-Lantern using the following recipe:
Read Also: How To Set Up Two Clash Of Clans Accounts On One iPhone - Step By Step Guide
| Materials | Crafting Recipe |
| Pumpkin | |
| Torch | |
Step 3: Place the Pumpkin
Select the Jack-o’-Lantern from your inventory and place it in the desired location. Make sure there is enough space around the pumpkin for carving.
Step 4: Carving
Read Also: Learn How to Play Infected Mode in Among Us | Step-by-Step Guide
Now it’s time to carve your pumpkin. Right-click on the Jack-o’-Lantern with the carving tool selected. This will open the pumpkin carving interface.
Step 5: Admire Your Carved Pumpkin
Once you’re satisfied with your pumpkin carving, take a step back and admire your creation. Your carved pumpkin will emit a soft glow at night, adding a delightful touch to your Minecraft world.
Now you know how to carve a pumpkin like a pro in Minecraft! Let your creativity shine and experiment with different face patterns to create unique and impressive designs. Whether it’s Halloween or any other time of the year, a carved pumpkin is sure to enhance the ambiance of your Minecraft builds.
Before you can start carving a pumpkin in Minecraft, make sure you have the following materials:
It’s important to gather all of these materials before you begin carving, as you don’t want to be interrupted or have to pause to find something in the middle of the process. Once you have everything you need, you’re ready to move on to the next step.
In order to carve a pumpkin in Minecraft, you will first need to find and obtain a pumpkin in the game. Pumpkins can be found naturally generated in the game world or can be grown by planting pumpkin seeds.
Once you have obtained a pumpkin, you will need to gather the necessary tools and materials to carve it. Here’s what you will need:
Before you start carving, make sure to clean the exterior of the pumpkin by removing any dirt or debris. This will help ensure a clean and smooth carving surface. You can use a damp cloth or sponge to wipe away any dirt.
Once you have gathered all the necessary materials and prepared the pumpkin, you are ready to start carving! Proceed to the next step to learn how to carve a pumpkin in Minecraft.
Now that you have your pumpkin ready, it’s time to carve your design! Follow these steps to carve a pumpkin in Minecraft style like a pro:
Remember, carving pumpkins can be a fun and creative activity, but it’s important to prioritize safety. Always supervise children, use caution when handling sharp tools, and make sure to place your carved pumpkin in a safe location away from flammable materials.
To carve a pumpkin in the Minecraft style, you will need a pumpkin, a carving knife or pumpkin carving tools, a marker or pencil, and a pattern or template of the Minecraft design you want to carve.
You can find Minecraft pumpkin carving patterns or templates online. There are many websites and online communities dedicated to sharing pumpkin carving patterns, including ones specifically for Minecraft designs. A simple search on a search engine or online marketplace should lead you to a variety of options.
To transfer the Minecraft design onto the pumpkin, you can use a marker or pencil to trace the design directly onto the pumpkin’s surface. Alternatively, you can print out the design and tape it onto the pumpkin, then use a pin or needle to poke holes along the lines of the design, creating a dotted outline that you can carve along.
While it is technically possible to eat the pumpkin after carving it, it’s not recommended. Carved pumpkins are often left out for display for an extended period of time, which can cause them to spoil and become unsafe to consume. Additionally, the pumpkin’s flesh may have been exposed to bacteria during the carving process. It’s best to use a fresh pumpkin for cooking or baking purposes instead.
When Is Roblox Egg Hunt 2022 Coming Out? Roblox fans, get ready for an egg-citing adventure this Easter! The highly anticipated Roblox Egg Hunt 2022 …
Read Article
The ‘E3’ 2022 schedule: all the summer showcases coming this year The gaming industry’s biggest event, the Electronic Entertainment Expo (E3), is back …
Read Article
Every safe code location in The Last of Us Part 1 The Last of Us Part 1 is a critically acclaimed action-adventure game set in a post-apocalyptic …
Read Article
When Is Fortnite Mobile Coming Back 2022? Fortnite, the immensely popular battle royale game developed by Epic Games, is set to make a comeback on …
Read Article
How To Install Minecraft Shaders? If you’re a fan of Minecraft, you’ve probably heard about shaders. Shaders are a type of mod that can enhance the …
Read Article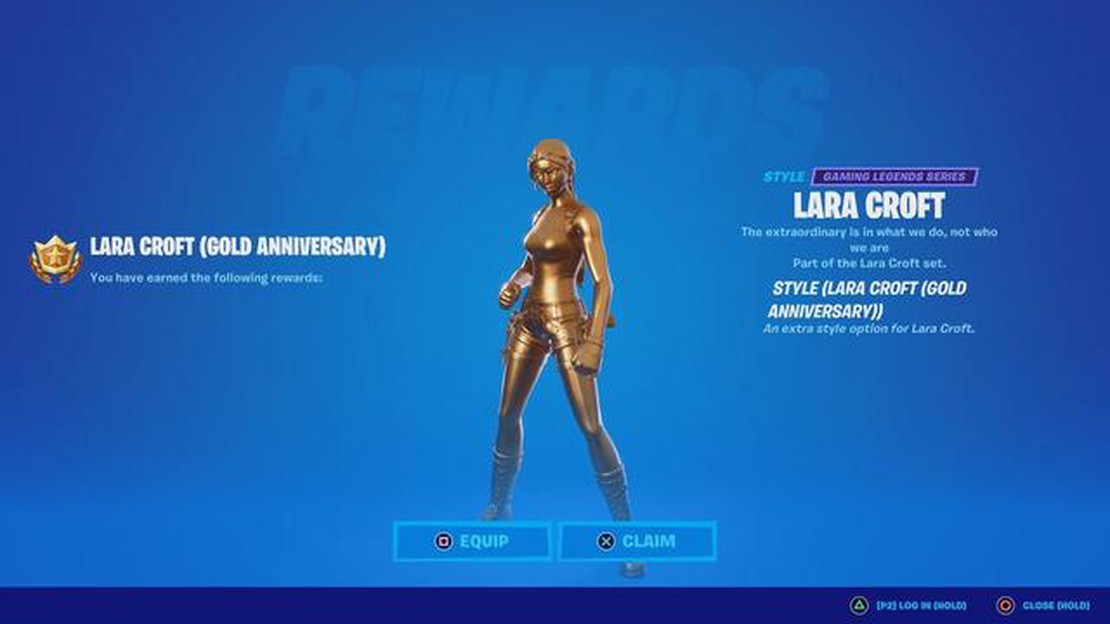
How To Get Gold Lara Croft Fortnite? If you’re a fan of the Tomb Raider series and a Fortnite player, you’re in luck! Epic Games has collaborated with …
Read Article


