


AMD Radeon RX 5700 XT Review: Unleashing the Power of Next-Gen Gaming Performance
AMD Radeon RX 5700 XT review The AMD Radeon RX 5700 XT is the latest offering from AMD, designed to deliver the ultimate gaming experience for the …
Read Article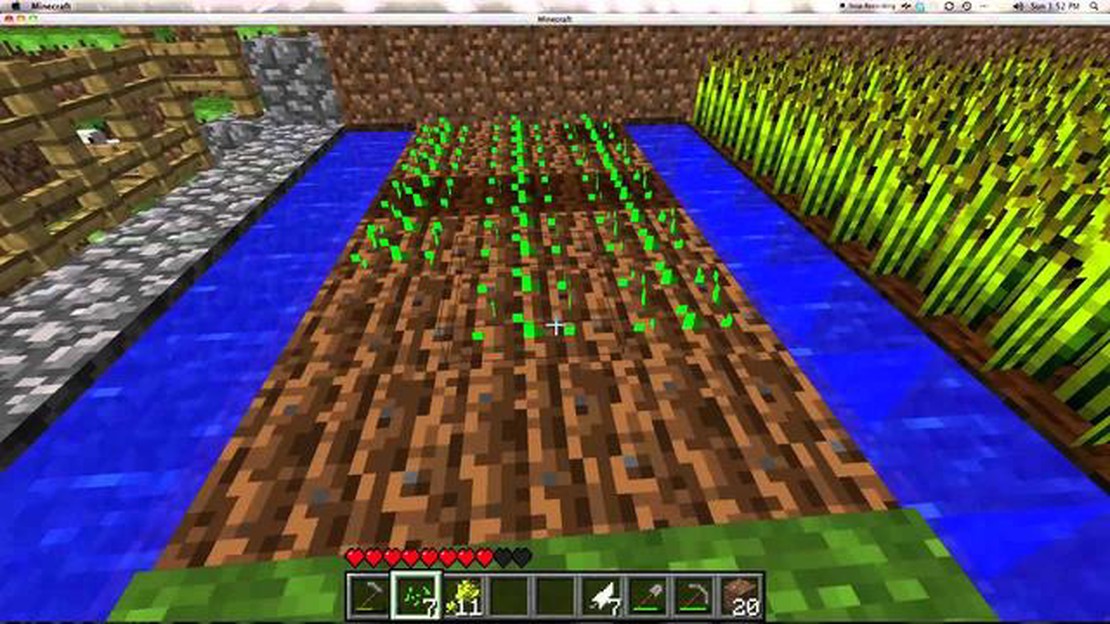
Wheat is an essential crop in Minecraft as it can be used to make bread, one of the most basic and important food sources in the game. Learning how to plant wheat is a crucial skill for any beginner player who wants to survive and thrive in their Minecraft world.
To start planting wheat, you’ll first need to find and gather wheat seeds. These can be obtained by destroying tall grass that is found abundantly in most biomes. Simply left-click on the tall grass and it will drop wheat seeds along with other possible drops.
Once you have collected enough wheat seeds, you can then find a suitable location to start your wheat farm. Look for an open area of land, preferably near a water source, as wheat needs to be hydrated to grow. Clear any debris or tall grass from the area to prepare the soil for planting.
Now it’s time to prepare the soil for planting. Wheat can only be planted on hoed soil, so you’ll need to craft a wooden hoe and till the land before you can sow the seeds. Simply right-click with the wooden hoe on the dirt blocks to create farmland.
Finally, it’s time to plant the wheat seeds. Select the seeds in your hotbar and right-click on the prepared farmland to plant them. Each seed will consume one block of farmland, so make sure you have enough tilled land for all your seeds. The seeds will then turn into small wheat sprouts.
To ensure proper growth, make sure the wheat is always hydrated. Water can be placed near the wheat farm, or if there is a water source nearby, the wheat plants will automatically absorb water from it. Always keep an eye on the wheat plants and harvest them when they are fully grown by breaking them with a hand or a tool.
Wheat is an essential crop in Minecraft. With wheat, you can make bread, breed animals, and create various food items. In this guide, we will show you the step-by-step process of planting and growing wheat in Minecraft.
Before you can start planting wheat, you need to prepare the land. Find an open area of soil and use a hoe to till the ground. This will turn the grass or dirt into usable farmland.
Once you have tilled the land, it’s time to plant the wheat seeds. Select the wheat seeds from your inventory and right-click on the tilled soil to plant them. Each seed will grow into a stalk of wheat.
Wheat crops require water to grow. Make sure there is a water source nearby, such as a pond or a well. The water should be within 4 blocks of the crops for them to stay hydrated. You can create an irrigation system using water channels if needed.
Now that the wheat seeds are planted and watered, it’s time to wait for them to grow. The wheat will go through several growth stages before it is ready to be harvested. You will notice the wheat stalks gradually growing taller and turning yellow when they are fully grown.
Once the wheat is fully grown, you can harvest it. Use any tool, such as your hand or a hoe, to break the wheat stalks. This will drop wheat items, which you can collect.
Congratulations! You now know how to plant and grow wheat in Minecraft. With a steady supply of wheat, you can create delicious bread, breed animals, and sustain yourself in the game.
Wheat seeds are an essential part of growing wheat in Minecraft. These seeds can be obtained by breaking tall grass, a common plant found in most biomes. When broken, tall grass has a chance to drop wheat seeds along with other items.
Planting Wheat Seeds:
Growing Wheat:
After planting the seeds, they will go through several stages of growth before being fully grown wheat. Here are the different growth stages:
Read Also: What Does Spinning Mean In Brawl Stars? - Explained
| Stage | Appearance | Growth Time |
|---|---|---|
| Stage 1 | Seedling | 0-9 minutes |
| Stage 2 | Tall Grass | 10-14 minutes |
| Stage 3 | Tall Grass with small wheat sprouts | 15-19 minutes |
| Stage 4 | Tall Grass with bigger wheat sprouts | 20-29 minutes |
| Stage 5 | Fully grown wheat | 30-39 minutes |
It is important to note that wheat requires light to grow. If your planted wheat seeds are not exposed to sunlight, they will not grow and may even die.
Harvesting Wheat:
Once your wheat is fully grown and has turned golden-yellow, it is ready to be harvested. Simply approach the fully grown wheat and right-click on the wheat blocks. Each block will drop one wheat item.
Wheat can be used for various purposes, such as making bread, feeding animals, or breeding cows. It is a versatile crop that can be a valuable resource for your survival in Minecraft.
Now that you understand the basics of wheat seeds and how to grow wheat, you can start your own wheat farm and enjoy the benefits it provides!
Read Also: How To Find Slimes In Minecraft - A Comprehensive Guide
When it comes to planting wheat in Minecraft, finding the right location is key. Wheat needs specific conditions to grow properly, so choosing a suitable area is crucial for a successful harvest.
Sunlight: Wheat requires a good amount of sunlight to grow. Make sure you choose an open area with plenty of exposure to the sun. Avoid shaded or underground locations, as they won’t provide enough light for the wheat to thrive.
Soil: Wheat grows best in fertile soil, so look for areas with grassy or dirt blocks. Avoid areas with sand, gravel, or other non-fertile blocks, as they won’t allow the wheat to grow properly.
Water: While not strictly necessary, water can help speed up the growth process. Consider planting your wheat near a water source, like a river or a lake, to make watering more convenient.
Space: Wheat plants need some space to grow, so make sure you have enough room for them to expand. Leave at least one block of space between each wheat plant to prevent overcrowding.
Protection: Keep in mind that other players or hostile mobs can trample on your wheat and destroy it. To protect your crops, consider building fences or other barriers around your wheat field.
By keeping these factors in mind and choosing a suitable location, you’ll increase your chances of a successful wheat harvest in Minecraft.
Planting wheat in Minecraft is a straightforward process that requires a few simple steps. Follow these instructions to successfully plant and grow wheat in your Minecraft world:
By following these steps, you should be able to grow a successful wheat farm in Minecraft and have a steady supply of wheat for various purposes.
Wheat is used mainly for crafting bread, which is an essential food source in the game. It can also be used to breed and heal animals.
You can obtain wheat seeds by breaking tall grass or by harvesting fully grown wheat crops. The wheat seeds can then be replanted to grow more wheat.
Yes, you can speed up the growth of wheat by using bone meal on the crops. Right-click the fully grown wheat with bone meal to instantly harvest it. Keep in mind that bone meal is a limited resource and cannot be used on crops that are not fully grown yet.
Wheat grows best in well-lit areas with a water source nearby. It also requires tilled soil and air blocks above it. If the conditions are right, wheat will gradually grow and mature into fully grown crops.
The growth time for wheat in Minecraft depends on several factors, such as the light level, nearby water source, and the presence of suitable blocks above the crops. On average, it takes approximately 1-3 Minecraft days for wheat to grow from a planted seed to a fully grown crop.
Yes, you can automate the wheat farming process by using redstone mechanisms and water channels to harvest and replant the crops automatically. There are various designs and tutorials available online that can help you set up an automated wheat farm.
AMD Radeon RX 5700 XT review The AMD Radeon RX 5700 XT is the latest offering from AMD, designed to deliver the ultimate gaming experience for the …
Read Article
What Is A Pitfall Seed In Animal Crossing? If you’re an avid player of Animal Crossing, you’ve probably encountered pitfall seeds at some point. These …
Read Article
When Is The Clash Of Clans Update Coming Out? Clash of Clans, the popular mobile strategy game developed by Supercell, has gained a massive following …
Read Article
Drop Lord of the Rings Dwarvish ENTR The world of Middle-earth, created by J.R.R. Tolkien, has captivated readers and movie-goers alike with its rich …
Read Article
Steam’s second most-wishlisted game is a huge mystery—here’s what we know about it Over the years, Steam has become a hub for gamers to discover and …
Read Article
How To Get League Points Clash Of Clans? In Clash of Clans, league points are a key component of the game and are used to determine a player’s rank …
Read Article


